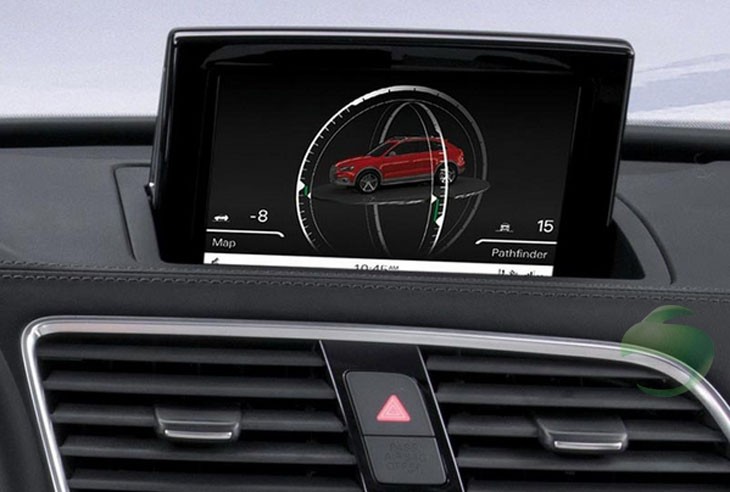
Audi Q3 audio video
It’s an upgraded Audi Q3 audio video GPS stereo from Seicane.com. There are many amazing functions in it, such as, GPS navigation system, TV, DVD and so on. More to know: http://www.seicane.com/aftermarket-oem-audi-q3-head-unit-stereo-sat-nav-system-with-8-inch-touch-screen-usb-sd-ipod-canbus-aux-srd-8860
If you want to have a new unit as the one above, here are upgrade steps for your reference. Before you install the Audi Q3 audio video GPS stereo, please apply your parking brake and remove the negative cable on vehicle battery.
Please check the appearance and the unit functions before installing the unit.
Don’t shorten or extend the GPS antenna, it will lead to the antenna problem.
Don’t make the GPS antenna winding the steering wheel and shift lever, it will be dangerous.
2012 2013 Audi Q3 car stereo installation instructions
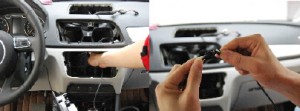
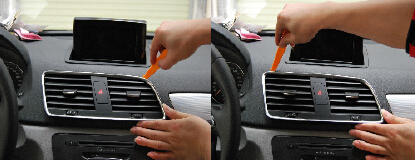
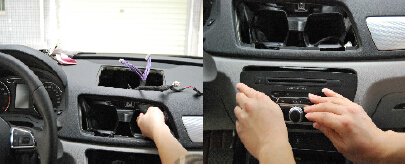
- The original center console.

- Dismantling air out of air condition and take out.
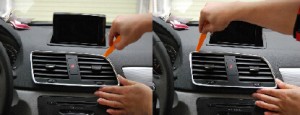
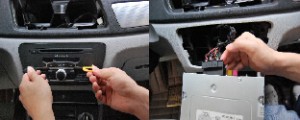
- Dismantling the screws of screen.
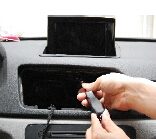
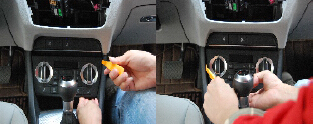
- Take original screen and take out the plug.
- Using CD key to dismantle CD player and take out the plug.
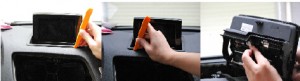
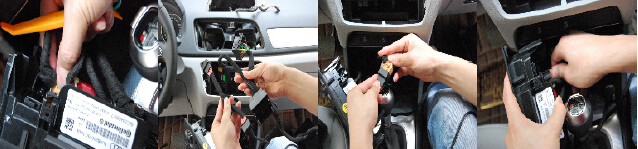
- Dismantling the panel of air condition.
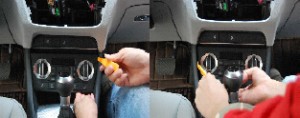
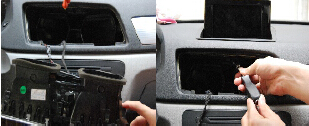
- Taking out the CAN plug of the air condition panel, then, connect to the CAN cable of the power line.
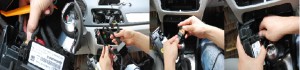
- Connect our power adapter cable to the original CD power plug.
- Connect the host plug correctly and fix the host well.

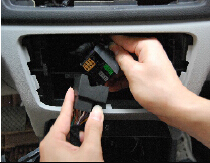
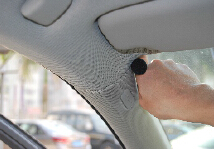
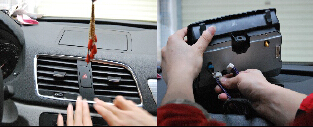
- Set the mini speaker near the driving area and insert the mini speaker plug right.
- Install the external mic at a driving area.
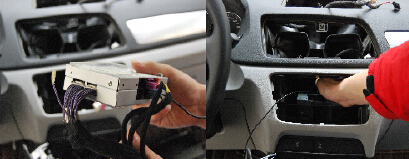
- Arrange the cables of the screen well on the center console board and reset the original CD.

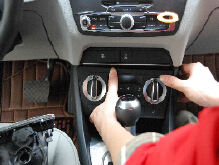
- Reset the air condition panel.
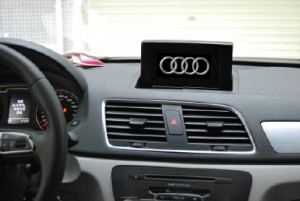
- Install the screen, insert the cable plug and tighten the screws.

- Reset the air condition vent panel.

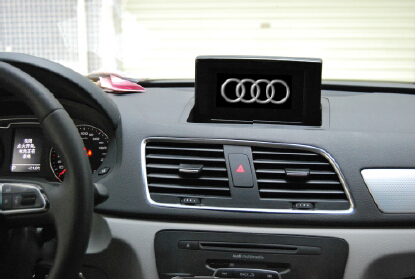
- Installation Photo.


After installation, you can test the new unit and enjoy the functions in it. In order to use it well, the following matters should be noticed.
- Don’t use strong chemicals, cleaning agents, strong detergent to washing the machine.
- Please use a clean soft fabric to wipe the screen, don’t use ordinary fabric.
- Please use the touch screen pen to operation unit, please don’t use other sharp objects, or it will damage the screen.
Please note that the navigation and rearview camera only do auxiliary function, it can’t replace your attention and judgment.
If you haven’t brought a new Audi Q3 audio video GPS stereo for your car, here are more information about the unit at the beginning of the text. You are welcome to know more and get discount: http://www.seicane.com/aftermarket-oem-audi-q3-head-unit-stereo-sat-nav-system-with-8-inch-touch-screen-usb-sd-ipod-canbus-aux-srd-8860
This unit can only fit to cars with AUX at present. You can go to the menu “entertainment” of your original CD’s screen and click “entertainment” to check if your car has AUX.
It adopts the latest 800MHZ ARM11 processor to develop high performance multimedia car dvd with the functions of GPS navigation, audio&video, entertainment and etc.
It has 8 inch 800*480 HD touch screen, which supports 1080p HD video. It has built-in 4*45w amplifier output. It has 12 OSD languages for your choice.
It’s great and cheap. Please make sure it fits your car and order it with all the optional functions you want.

Recent Comments