Recently, going on a trip by car has become a trend. When travelers spend long time in cars, they’ll easily get bored or tired. In that case, you can easily refresh them with a multifunctional car stereo which can support a wide range of entertainment feature for you to relax. If you don’t have one, you can simply pick a suitable one and install it in your car. Here I’d like to share a detailed 2002 2003 2004 CHRYSLER Dakota car stereo installation guide from Seicane with you, wish it can be helpful for you.

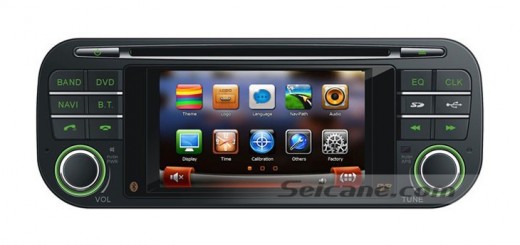
2002 2003 2004 CHRYSLER Dakota car stereo after installation
Tips about the installation:
1.Please disconnect the power before the installation.
2.Please prepare a lever and a screwdriver before the removal and the installation.
3.Please keep all the separate parts from the car. Please take great care of the dashboard to avoid scratching it during its detachment and installation. Please keep handy any parts from the car and make use of all the original screws from the car as much as possible. so each related part of the unit can be fixed securely.
2002 2003 2004 CHRYSLER Dakota car stereo installation guide
1.Remove the trim piece above cup holder with a lever.

1.Remove the trim piece above cup holder with a lever.
2.Remove 2 screws behind the trim piece.

2.Remove 2 screws behind the trim piece.
3.Gently pry around the side of trim panel with the lever and then remove the trim panel.

3.Gently pry around the side of trim panel with the lever and then remove the trim panel.
4.Remove 4 screws which holds the factory radio in place.

4.Remove 4 screws which holds the factory radio in place.
5.Take out the factory radio.

5.Take out the factory radio.
6.Disconnect the smaller harness on the behind of the factory radio.

6.Disconnect the smaller harness on the behind of the factory radio.
7.Connect the cables of the new Seicane car stereo according to the guidance of the user manual.
8.Connect the smaller harness at the back of the new radio.
9.Put the new Seicane car stereo back into the dash.
10.Install four screws and trim panel.
11.Install 2 screws behind the trim piece and the trim piece.
12.Turn on the new radio and have a comprehensive test.
Is it hard for you to install this 2002 2003 2004 CHRYSLER Dakota car stereo in your car with the help of this installation guide? If yes, then you’d better have a professional install it. Or incorrect installation may cause some unexpected damage to both your car or your new stereo.
Do you find an ideal replacement for your radio? If not, I’ d like to recommend an amazing 2002 2003 2004 CHRYSLER Dakota car stereo from Seicane to you. It is upgraded to the latest version. For more details, you are welcome to click:
This modern CHRYSLER Dakota car stereo comes with an amazing interface for you to operate everything. With comprehensive features, you are allowed to get to a number of unfamiliar location without getting lost any more. The bluetooth technology for hands-free calls and streaming music is also desirable. You can connect a rearview camera with this unit to make your parking easier.
Just surprise your passengers with this intelligent CHRYSLER Dakota car stereo and have a wonderful time with it!


Recent Comments