If you have a Seat Alhambra from 2010 to 2011 with the original car stereo, and you want to remove the stereo from your car, the following steps may help you in a way. The following is about the removal of a Seat Alhambra radio stereo. You can take it for reference. But, you are not recommended to do it yourself if you are a layman.
Please apply the parking brake and disconnect the negative cable on your car before the removal. And, you need a plastic knight and a screwdriver for the removal.
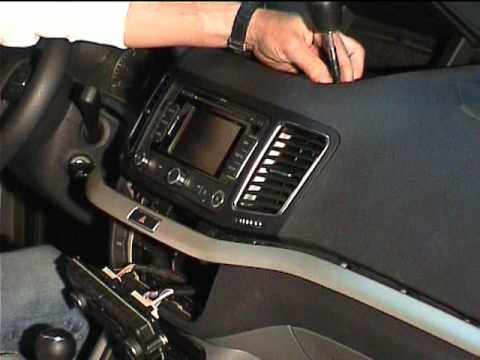
Seat Alhambra radio
First, remove the trim panel which is covering the control buttons.
Use a lever to pry the gaps between the trim panel and the dashboard and take the trim panel off the car. After this, you can see two screws which are fixing the control buttons. Remove them and take the control buttons out of the dash.
Second, remove the white strip which is under the radio.
After step1, you will see a screw which is fixing the strip. Unscrew it and put it away. Then, pull the white strip out of the dashboard.
Third, remove the trim panel which is above the radio.
Open the cover at the top of the dashboard and you can see two screws in the box. Remove them and use a lever to pry the box. After several times prying, take the box out of the dash. Then, you can see another two screws which are fixing the radio from the top. Remove them and keep them in a box.
Fourth, remove the rectangle trim panel which is covering the radio.
Use a lever to pry the trim panel around the radio to loosen it. Then, take it off the car and put it away. You can see four screws on the radio. Remove them and take the radio out of the dash by disconnecting the wires at the back of it.
Next, you can install a new Seat Alhambra radio in the car. Please connect the new unit to the original wiring harness correctly. The connections may be different between different stereos. If you have any question, please ask a professional or your dealer for help.
After connection, check whether the unit works well in your car. If there are problems, check the wires connections first. If the problem still exists, please ask for help.
In most cases, the new unit will work well. Wish you enjoy your new unit during driving. If you are still looking for a new good and cheap head unit for your car, check out the following one to see whether it fits your car. Here’s the link: http://www.seicane.com/dual-core-a9-8-inch-android-4-2-gps-sound-system-upgrade-for-2010-2011-seat-alhambra-with-aux-dvd-bluetooth-radio-rds-mirror-link-obd2-k8405
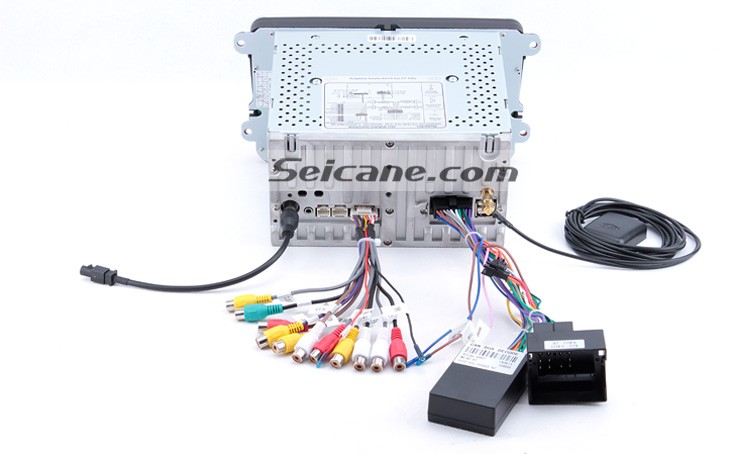
Seat Alhambra radio
This multifunctional Seat Alhambra radio DVD player adopts the internationally renowned Samsung brand electronic components which are in obedience with the ROHS rules and of small volume, excellent thermo stability, high voltage resistance and so on.
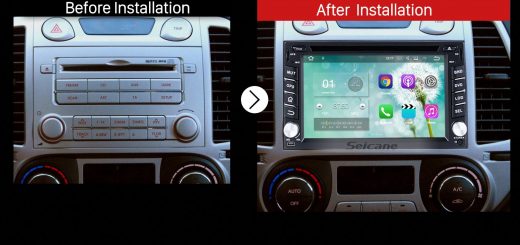
It has 8 inch 800×480 HD multi-touch digital capacitive LCD screen which supports 1080P HD video. The DVD player has anti shock memory and last position memory feature. You can play discs of DVD/DIVX/MP4/MP3/MP2/VCD format in it.
It has Bluetooth function for answering calls hand free and playing music; it supports IPod and IPhone charging and music play by a USB cable; it supports car speed DVR to record driving video; it supports rearview camera for car reversing and so on.
It will bring a big difference to your driving. The following video shows how to operate this unit. You are welcome to know more and get it with discount now.


Recent Comments