To upgrade your factory radio, it’s wise of you to choose one new aftermarket car stereo which can support the features that you need not the one with the highest price or the mote attractive design. After getting the ideal radio, you need to install it into your new car. To help you better install, I’ d like to introduce a step-by-step 1999-2004 Jeep Grand Cherokee car stereo installation guide from Seicane to you as a reference.

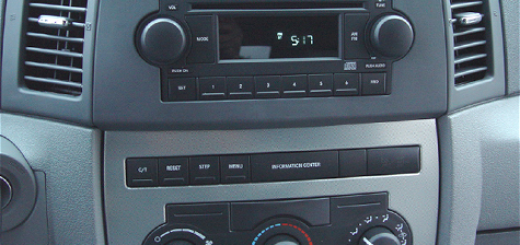
1999-2004 Jeep Grand Cherokee car stereo after installation
Tips about the installation:
1.Please disconnect the power before the installation.
2.Please prepare a lever and a screwdriver before the removal and the installation.
3.Please keep all the separate parts from the car. Please take great care of the dashboard to avoid scratching it during its detachment and installation. Please keep handy any parts from the car and make use of all the original screws from the car as much as possible. so each related part of the unit can be fixed securely.
1999-2004 Jeep Grand Cherokee car stereo installation guide
1.Remove the trim piece above cup holder with a lever.

1.Remove the trim piece above cup holder with a lever.
2.Remove 2 screws behind the trim piece.

2.Remove 2 screws behind the trim piece.
3.Gently pry around the side of trim panel with the lever and then remove the trim panel.

3.Gently pry around the side of trim panel with the lever and then remove the trim panel.
4.Remove 4 screws which holds the factory radio in place.

4.Remove 4 screws which holds the factory radio in place.
5.Take out the factory radio.

5.Take out the factory radio.
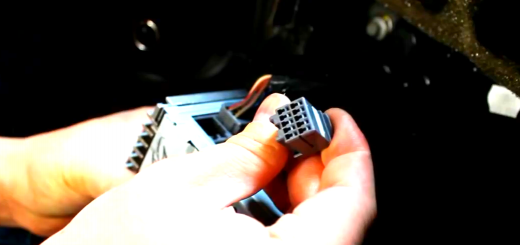
6.Disconnect the smaller harness on the behind of the factory radio.

6.Disconnect the smaller harness on the behind of the factory radio.
7.Connect the cables of the new Seicane car stereo according to the guidance of the user manual.
8.Connect the smaller harness at the back of the new radio.
9.Put the new Seicane car stereo back into the dash.
10.Install four screws and trim panel.
11.Install 2 screws behind the trim piece and the trim piece.
12.Turn on the new radio and have a comprehensive test.
Wish the above installation guide can be helpful for you. If you have any questions on the installation, then you can consult your dealer or a professional for help. Please make sure you are clear about every step before you start to install it. If it’ s the first time for you to upgrade your factory radio, then you’d better ask a professional for help.
Besides, if you don’t have an ideal car stereo at present, you can refer to this modern Jeep Grand Cherokee car stereo from Seicane. It comes with the most advanced configurations for you to upgrade your factory radio. Here’ s the link, please click:
This Jeep Grand Cherokee car stereo is loaded with a powerful Android 4.4.4 operation system for you to enjoy smooth performance. You are able to find your way to any location within seconds with the help of the worldwide real-time GPS navigation system. By simply connecting with you enabled mobile phone, you can make and receive hands-free calls and enjoy music streaming to stay safe and pleasant on the way.

Recent Comments