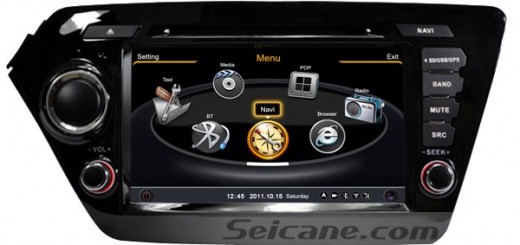
To get a relaxing driving experience on a long trip, you can upgrade your factory radio with a new aftermarket radio which comes with a number of features to meet your different needs. If you want to upgrade your factory radio, a detailed installation guide can be much helpful for you. Here I’ d like to share the step-by-step installation guide about a 2014 2015 KIA KX3 head unit from Seicane with you, wish you can get some help from it.
Precautions for this installation:
1.Before you start up any work, park your car well and unplug the negative power cable to avoid any danger.
2.Please make sure that all fastened wires are isolated with electrical tape.
3.Please make sure the ignition is off to avoid short circuit.
2014 2015 KIA KX3 head unit installation guide
1·Remove the original console panel with a plastic knife, pry gently along the gap and pick up the panel. Then set it aside.
2·Remove the four screws that fixed the radio on the dashboard. Remove these screws will not be a difficult job.

Remove the 2014 2015 KIA KX3 head unit four screws that fixed the radio on the dashboard installation
3·Pull the factory radio out of the dash. Pull it with medium force, as the wires are connected to the radio.
4·Unplug the connectors.
5·Remove the brackets on both sides of the factory radio. So far the removal of the factory radio is completed. Next steps will move to the installation of the Seicane head unit.
6·Install the brackets on both sides of the Seicane unit.
7·Dock the connectors of the original vehicle and the upgraded car audio.
8·Insert the wires to the appropriate location of the upgraded head unit. If you are not sure about how to wire correctly, you may refer to the wiring diagram for details.
9·Fix the Seicane aftermarket unit with the four screws.
10·Firm the console panel. Finally the new Seicane unit is installed and a comprehensive test should be conducted on the new radio.
The installation of a new head unit not too difficult, but you need to make clear every step before you start to install it. If there is any question, you can seek help from your dealer or a professional. If you are still looking for an ideal unit for your car, you are recommended to check out the following 2014 2015 KIA KX3 head unit from Seicane:
You can enjoy your favorite music in this KIA KX3 head unit with a large 10.2 inch touch screen as well as navigate to your desired destination. The music will become low in the background while switching to the navigation voice automatically. To simply pair with your enabled mobile phone, you can easily get hands-free calls and streaming music to keep safe and cheerful.
Navigate to any location with easy, this amazing KIA KX3 head unit is just your best road companion! Good luck to you!


Recent Comments