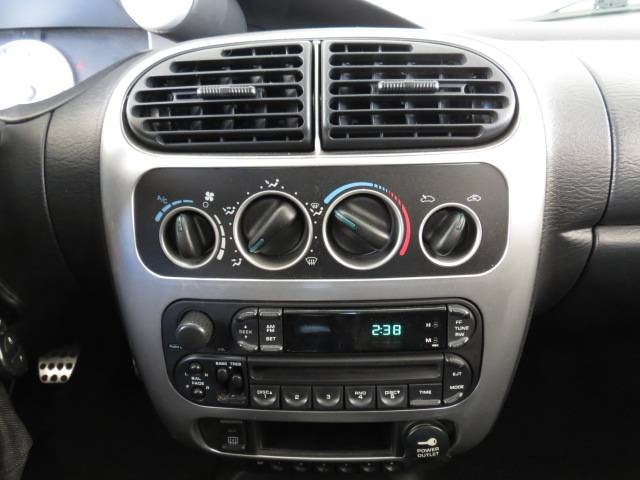
Dodge Neon stereo
If you have the same Dodge Neon stereo as the one above, it’s easy to upgrade it. The trim panel and the original unit can be easily removed. All you need to pay attention to is the installation of the new unit.
The installation of different would be a little different. If you want to install a new one easily, you should buy a new unit which is specialized for your car, or a plug and play one. This kind of units keeps your original wires and can be connected to the wiring harness easily.
Suppose that you have a new unit for your car now. Then, we cut off the power supply before the upgrade. And, we prepare a lever and a screwdriver for the upgrade. Now, let’s follow the steps below.
Dodge Neon stereo removal guide:
- Remove the trim panel. There are several things you should do before you remove the trim panel. First, remove the 4 buttons on the panel. Second, remove the air vents on the trim panel. Third, remove the screws in the trim panel. Forth, remove the trim panel.
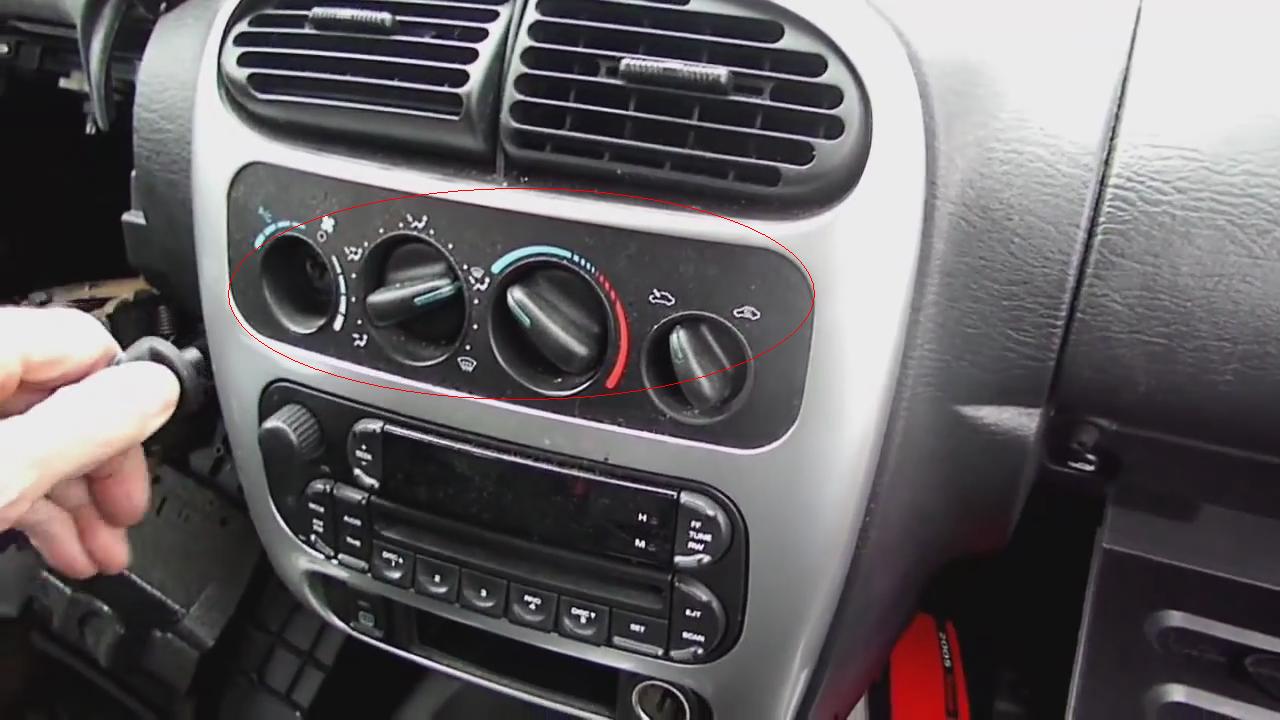
remove buttons on Dodge Neon
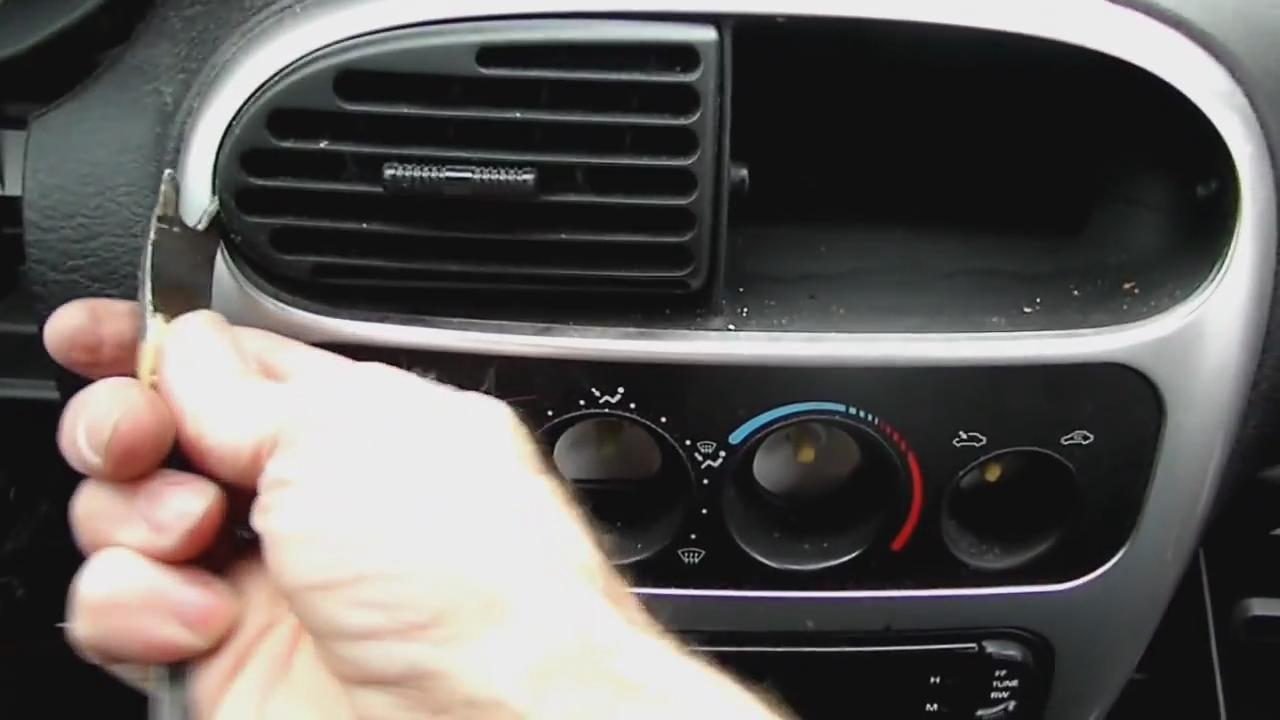
remove air vents on Dodge Neon

remove screws on Dodge Neon
- Remove the old unit. There are 4 screws on the radio that you should remove. Then, take it out of the dash gently and remove the wires at the back of it.
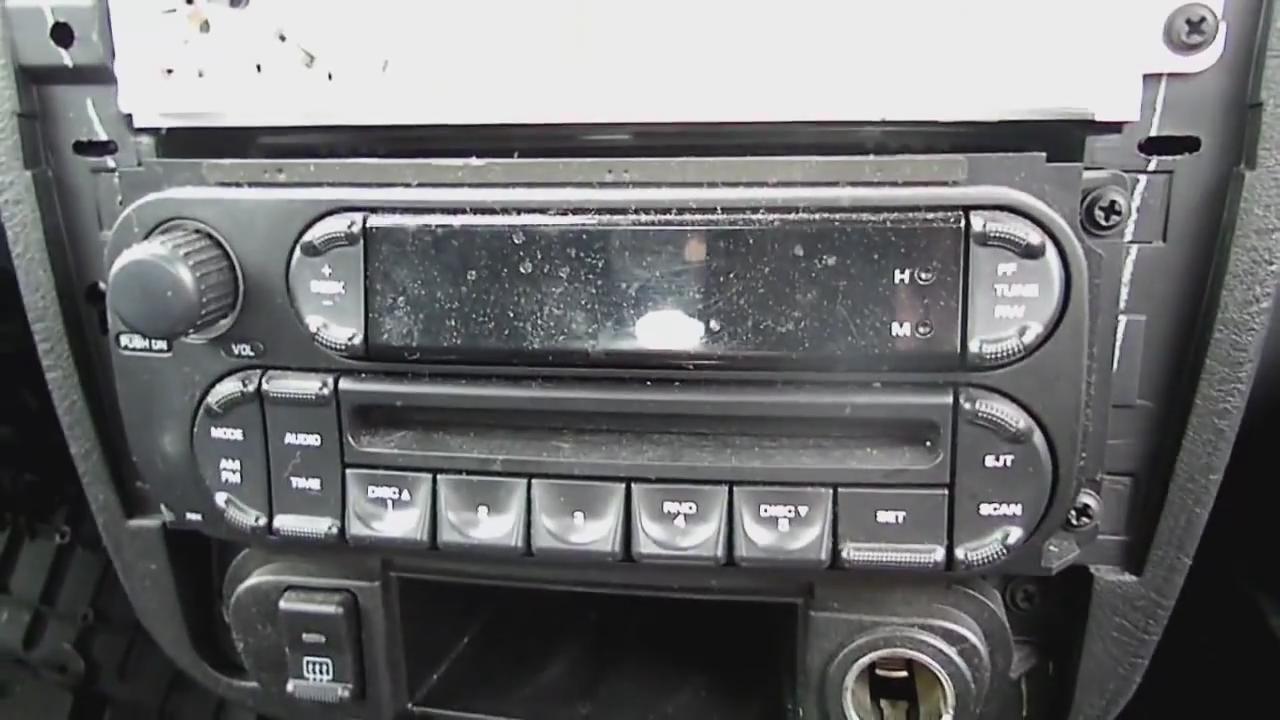
remove radio on Dodge Neon
- Install the new unit. Connect the new unit to the original wiring harness by following the wiring diagram from your dealer. If you don’t have it and are confused, please ask for help. A wiring diagram for Dodge Neon stereo from Seicane for your reference.
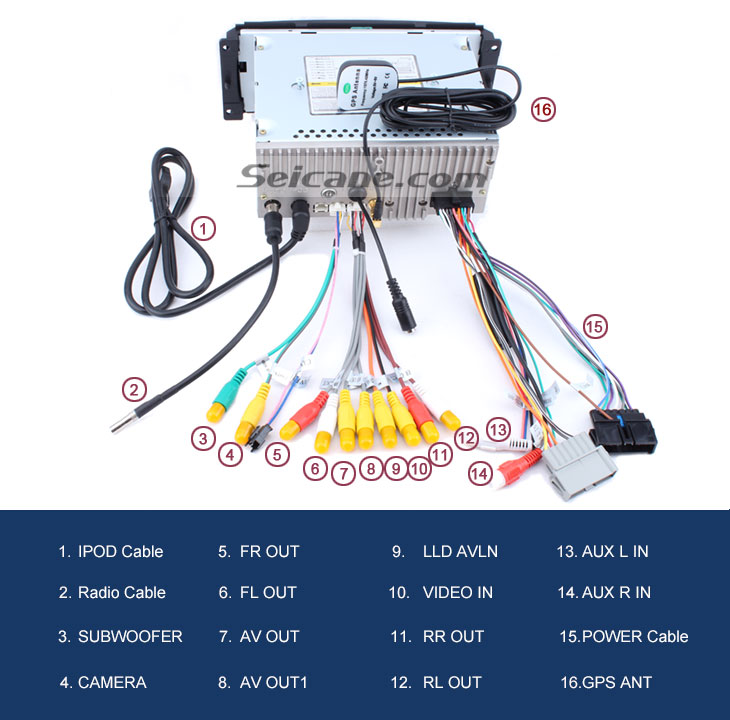
wiring diagram
- Test the new unit. Refer to the user manual and test the functions in the new unit to see if it works well in your car. In most cases, the new unit will work well in your car. If it doesn’t, please double check the wires connections or ask for help.
- Install the trim panel back to the original place.
Now, you have upgraded your car stereo successfully. Wish the information could help you. If you are interested in the unit from Seicane, you are welcome to know more on website. It’s on discount now: http://www.seicane.com/2002-2003-2004-2007-dodge-dakota-durango-intrepid-lcd-touch-screen-sat-nav-car-stereo-removal-dvd-tv-radio-rds-bluetooth-ipod-iphone-dual-zone-aux-steering-wheel-control-t6096
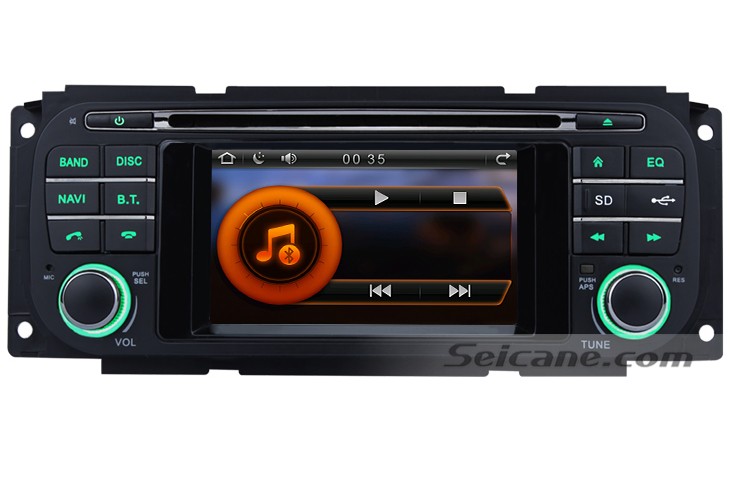
Dodge Neon stereo
This unit comes with 3-band EQ to satisfy your needs of sound quality. It has dual zone functions for navigation system to work with entertainment functions at the same time.
It has Bluetooth function for phone book downloading, music play and so on. Its radio function supports RDS and 30 stations preset for AM/FM. It supports IPod and IPhone music, too.
It can do more than you think. You are welcome to send a picture of your car’s dashboard with the year and model enclosed to our email sales@seicane.com now, and our pre-sale service team will check if this system works with your car.
Wish you like this unit and enjoy shopping on Seicane.com.


Recent Comments