Nowadays, as people’s economic condition rapidly improves, more car owners can afford an ideal multifunctional car radio. But as one of them, if you don’t know how to install a car radio, you still need to pay extra money for its installation. However, if you have some related installation experience and a detailed guide, you can try to finish the installation by yourself. Today I would like to share a 2010 2011 2012 2013 Opel Astra J car radio installation instruction from Seicane with you. If you have the same or similar dashboard and plan to replace your factory radio by yourself, you can refer to the following 2010 2011 2012 2013 Opel Astra J car radio installation instruction from Seicane.

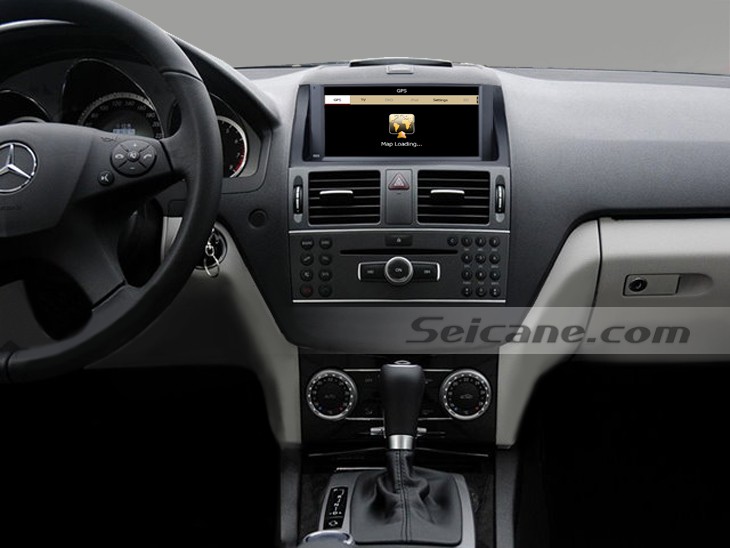
2010 2011 2012 2013 Opel Astra J DVD GPS Bluetooth Car Radio after installation
Before and during installation, you should notice:
1.Before connecting, please make sure the ignition is off to avoid short circuit.
2.Ensure connect the yellow and red power cable at last.
3.Ensure that all loose wires are isolated with electrical tape
4.Ensure don’t tangle the wire when tighten the moving parts(Such as seat rails).
5.Ensure that all ground is connected to the same place.
6.Using the improper fuse may cause damage of fire, so when replace the fuse, please consult the professional.
7.For your convenience, here’s the recommended tools for removal and installation from Seicane, please check for more details: http://www.seicane.com/car-dvd-dismantling-device-srd-400
2010 2011 2012 2013 Opel Astra J car radio installation instruction
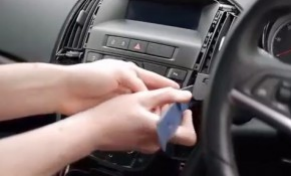
Step 1: Remove the panel as the picture shows with a plastic tool.
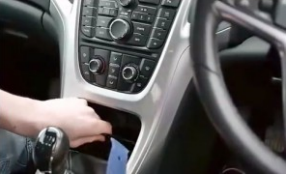
Remove the panel as the picture shows with a plastic tool
Step 2: Pull out the shifter cover.
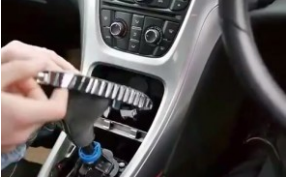
Pull out the shifter cover
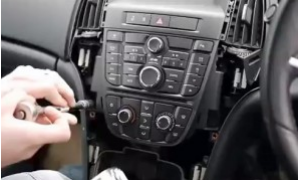
Step 3: Remove two screws of each side with a Phillips screwdriver.
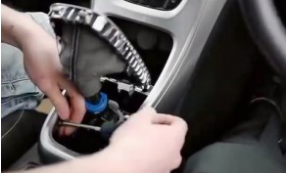
Remove two screws of each side with a Phillips screwdriver
Step 4: Remove the whole trim panel and set it aside.
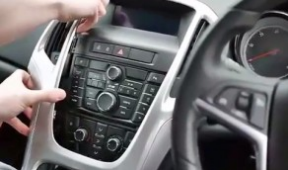
Remove the whole trim panel and set it aside
Step 5: Pry two chips at each side of the center control.
Pry two chips at each side of the center control
Step 6: Remove eight 10mm bolts holding the center control panel in place.
Remove eight 10mm bolts holding the center control panel in place
Step 7: Pull out the center control panel.
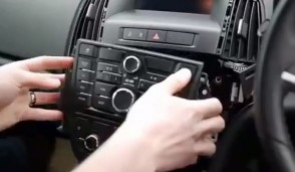
Pull out the center control panel
Step 8: Unplug the connectors behind it.
Unplug the connectors behind it
Step 9: Remove two 10mm bolts.
Remove two 10mm bolts
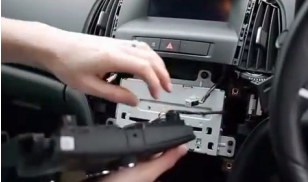
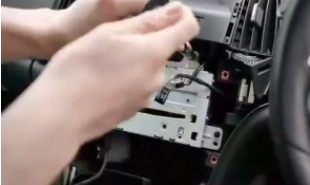
Step 10: Pull out the factory radio and unplug the connectors behind it.
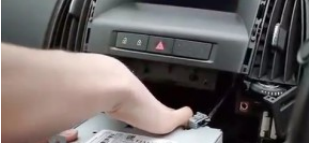
Pull out the factory radio and unplug the connectors behind it
Step 11: Check all the accessories for the new Seicane car radio.
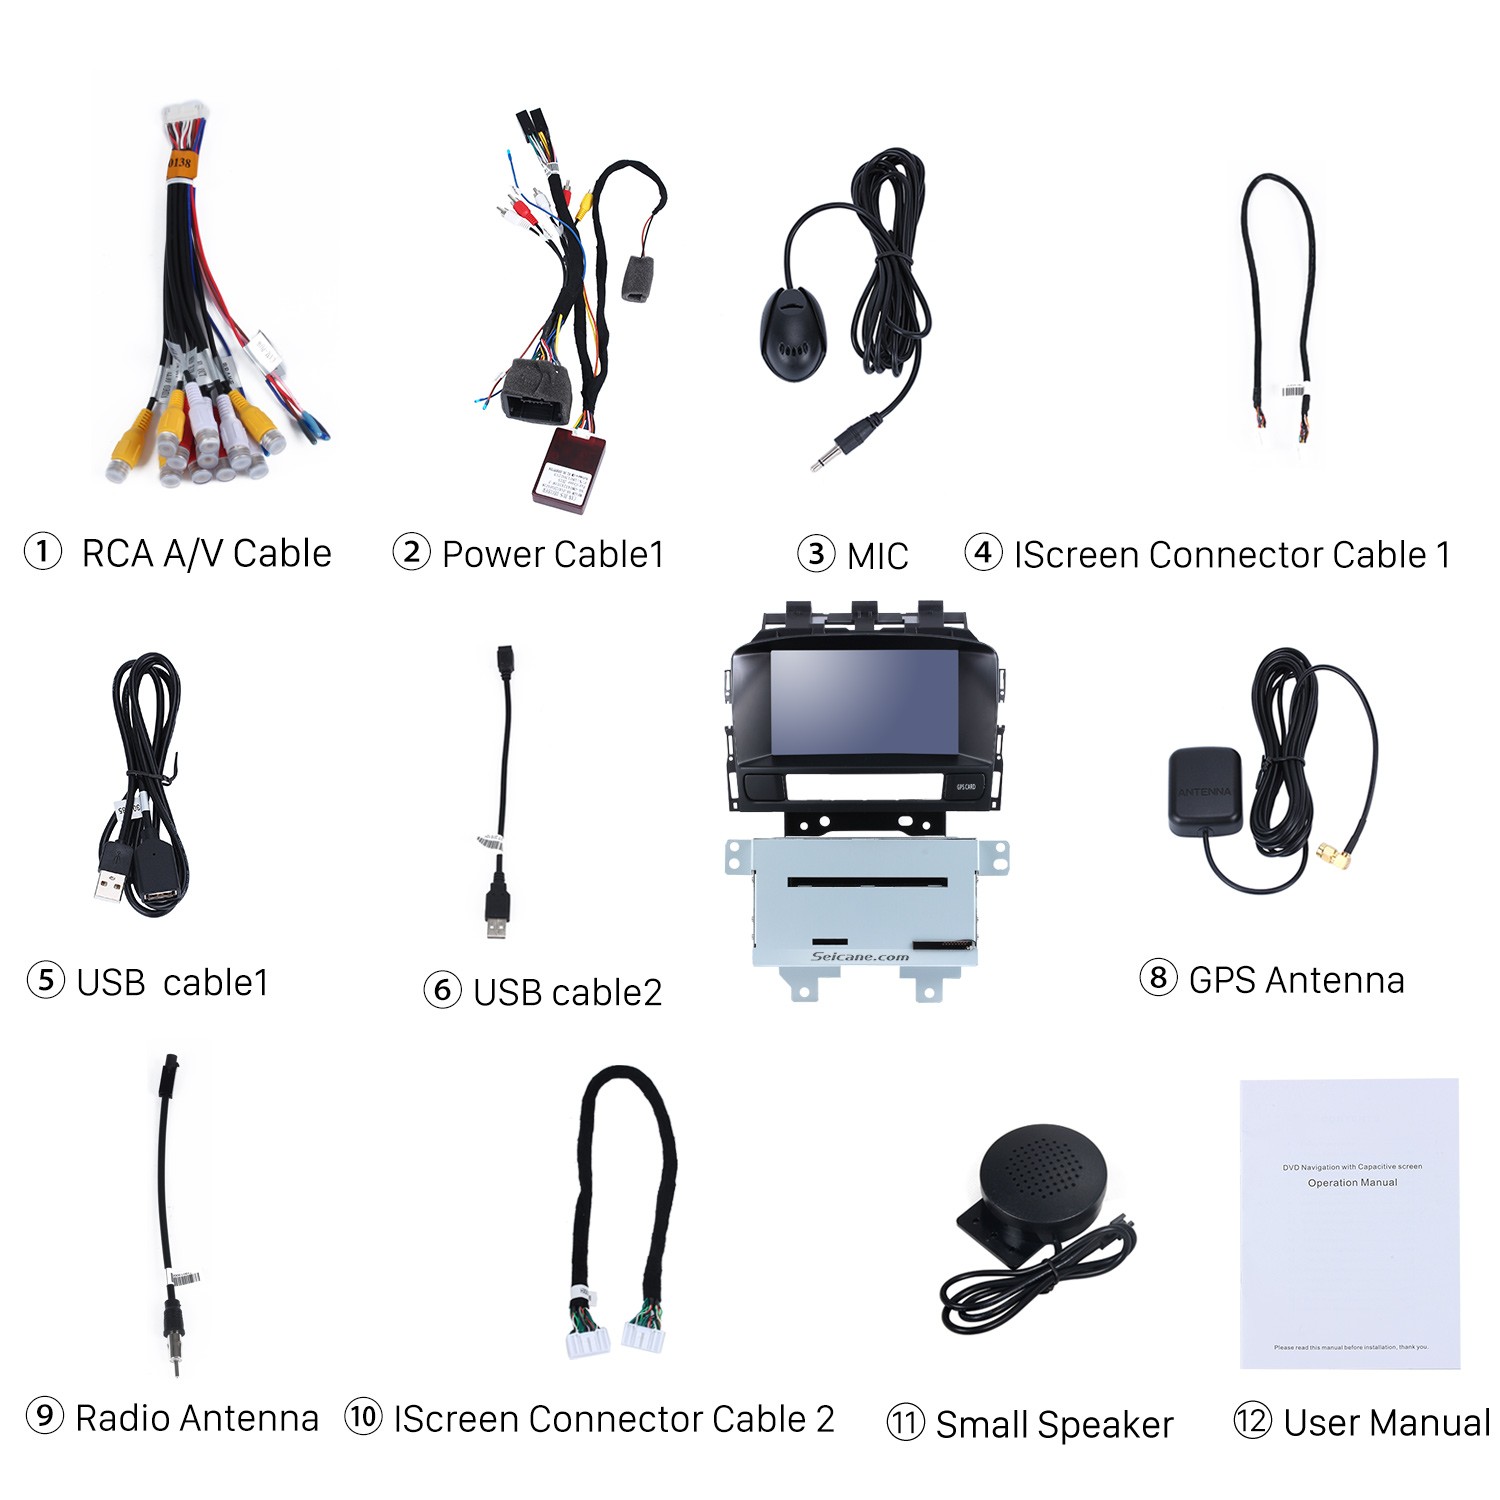
Check all the accessories for the new Seicane car radio
Step 12: Connect the harnesses to the back of the new Seicane car radio.
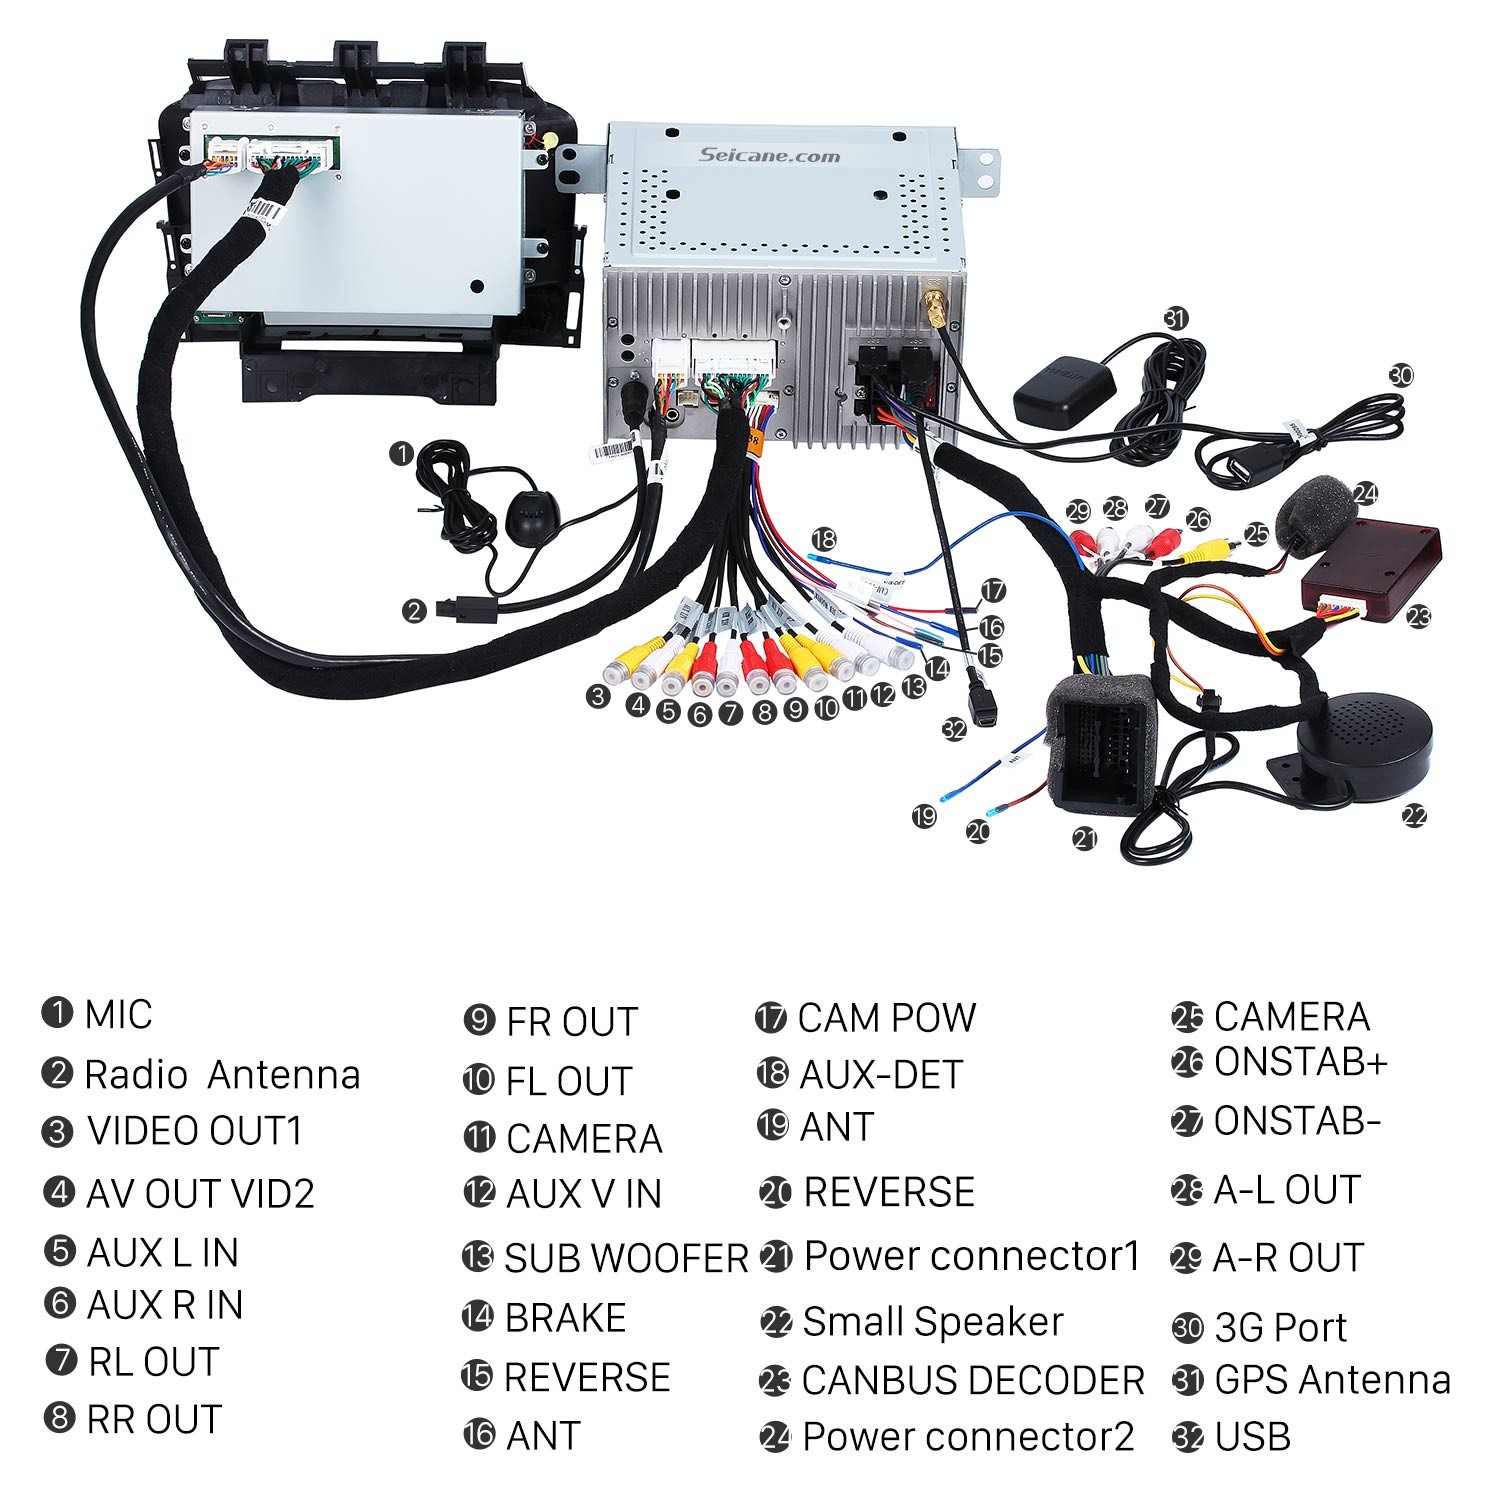
Connect the harnesses to the back of the new Seicane car radio
Step 13: Connect the Seicane car radio to your original car radio’s plugs.
Step 14: Put the new Seicane car radio into your car, you should check whether your connections are correct, and you’d better have a tidy for the cables.
Step 15: If everything is OK, firm bolts and screws then make trim panel back on your new Seicane car radio.
Before or during the installation, it is not abnormal for you to come across any problems. In that case, please calm down firstly. Then you can consult your dealer, communicate with someone experienced or turn to a professional for help. If you still think the upgrade process is too complicated, you can directly go to a car radio upgrade center to have the new car radio installed by a professional technician. Besides, if you are still looking for a suitable car radio for your beloved car, here I would to introduce an amazing 2010 2011 2012 2013 Opel Astra J car radio from Seicane to you.
With this amazing car radio installed in your beloved car, you will surprisingly find that almost all your various needs can be met in your car.
This car radio’s operation system has been upgraded to the stable Android 6.0 version and it has a powerful 8 – Core 1.5 GHz Coretex-A53 processor for you to enjoy a more stable, much faster and smoother operation experience.
Even though you have no good sense of directions, you can fully utilize the GPS function to know your current locations and find the right way to reach your desired destinations through turn-by-turn directions and voice prompts. Besides, this unit’s dual zone function enables you to play music behind the scene under GPS mode, and the music can automatically switch to GPS voice.
What’s more, under the wireless Bluetooth technology, both Bluetooth hands-free calls and streaming music are available for you as long as you connect your Bluetooth-enabled mobile phone sync with this unit.
Wish you like this unit and good luck to you!

Good day I am driving an opel astra j 2014 model just wanna find out how much is the DVD, navigator screen, I stay in South Africa
please visit http://www.seicane.com