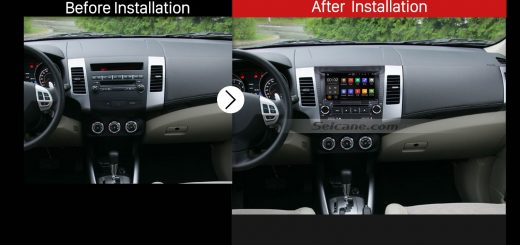
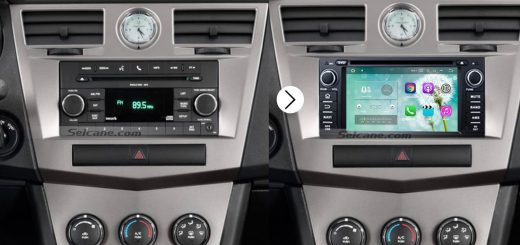
If you think your factory radio is not advanced enough to meet most of your needs in car, then it is time for you to remove the factory radio and install a new head unit. A qualified head unit should not only possess practical functions but also have entertainment features, which can bring your in-car life up a level. The following steps are about how to remove and install a 2012 Honda Civic head unit. If you happen to have the same dashboard, then you can read these steps as reference.

2012 Honda Civic Radio after installation
Some tips before the installation:
1.Please disconnect the power before the installation.
2.Please prepare a lever and a screwdriver before the removal and the installation.
3.Please keep all the separate parts from the car. Please take great care of the dashboard to avoid scratching it during its detachment and installation. Please keep handy any parts from the car and make use of all the original screws from the car as much as possible. so each related part of the unit can be fixed securely.
4.For your convenience, here’s the recommended tools for removal and installation from Seicane, please check for more details: http://www.seicane.com/car-dvd-dismantling-device-srd-400
2012 Honda Civic head unit installation guide
1. Remove the automotive oil table top panel with plastic knife.
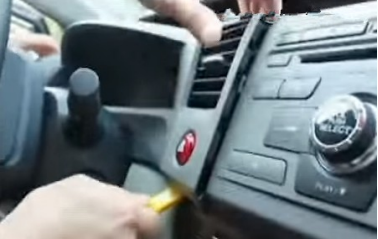
Remove the automotive oil table top panel with plastic knife
2. Remove the screws under the original car CD.
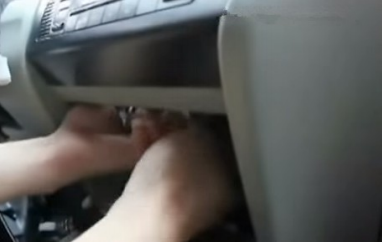
Remove the screws under the original car CD
3. Take the original radio out of the dash.
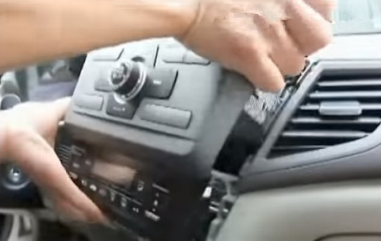
Take the original radio out of the dash
4. Pull the plugs at the back of the original radio.
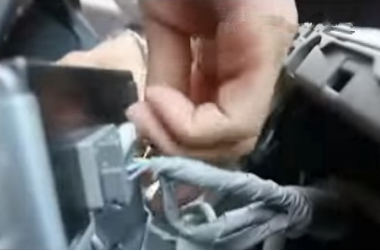
Pull the plugs at the back of the original radio
5. Check all the accessories for the new Seicane head unit.
6. Connect the harnesses to the back of the new Seicane head unit.
7. Connect the Seicane head unit to your original car radio ‘s plugs.
8. Put the new Seicane head unit into the dash.
9. Turn on the new Seicane head unit and check whether the unit is working properly. If not, please check whether all the cables are connected correctly.
10. Install screws and the panel, and put everything into their original place.
Now do you know how to remove and install a 2012 Honda Civic head unit? If you still don’t know it, you can contact your dealer or seek help from a professional technician. But if your head unit is not compatible with your car, even if you install it in your car, it won’t work well with your car. So to help you better select a suitable head unit, I’d like to recommend a 2012 Honda Civic head unit from Seicane to you. For more details, please click:
This head unit, specially manufactured for 2012 Honda Civic, is based on the stable Android 5.1.1 operation and has powerful RK3188 1.6 GHz Cortex A9 Quad-core processor.
With a large 8 inch HD digital multi-touch screen, you can freely enjoy movies, music videos, TV programs and other entertainment files. You are able to enjoy its best display effect and perfect view of your road ahead.
Equipped with worldwide real-time navigation function of high accuracy, this head unit enables you to get access to such features, including current location, landmark building display, 3D street view, destination search, turn-by-turn voice directions. So you are capable of know your current location quickly and navigate to your desired destinations accurately.
Wish you like this unit! Good luck to you!

Recent Comments