As time goes by, you may find that your factory radio is not intelligent enough to meet your different needs since it cannot support a lot of new modern features. Under this circumstance, it is wise of you to upgrade the factory radio with a new aftermarket head unit. If you are an owner of a 2004-2014 Ford F150 F250 F350, you can refer to a detailed head unit installation guide before you start the head unit installation. The following is an easy-to-understand 2004-2014 Ford F150 F250 F350 head unit installation guide for your reference.
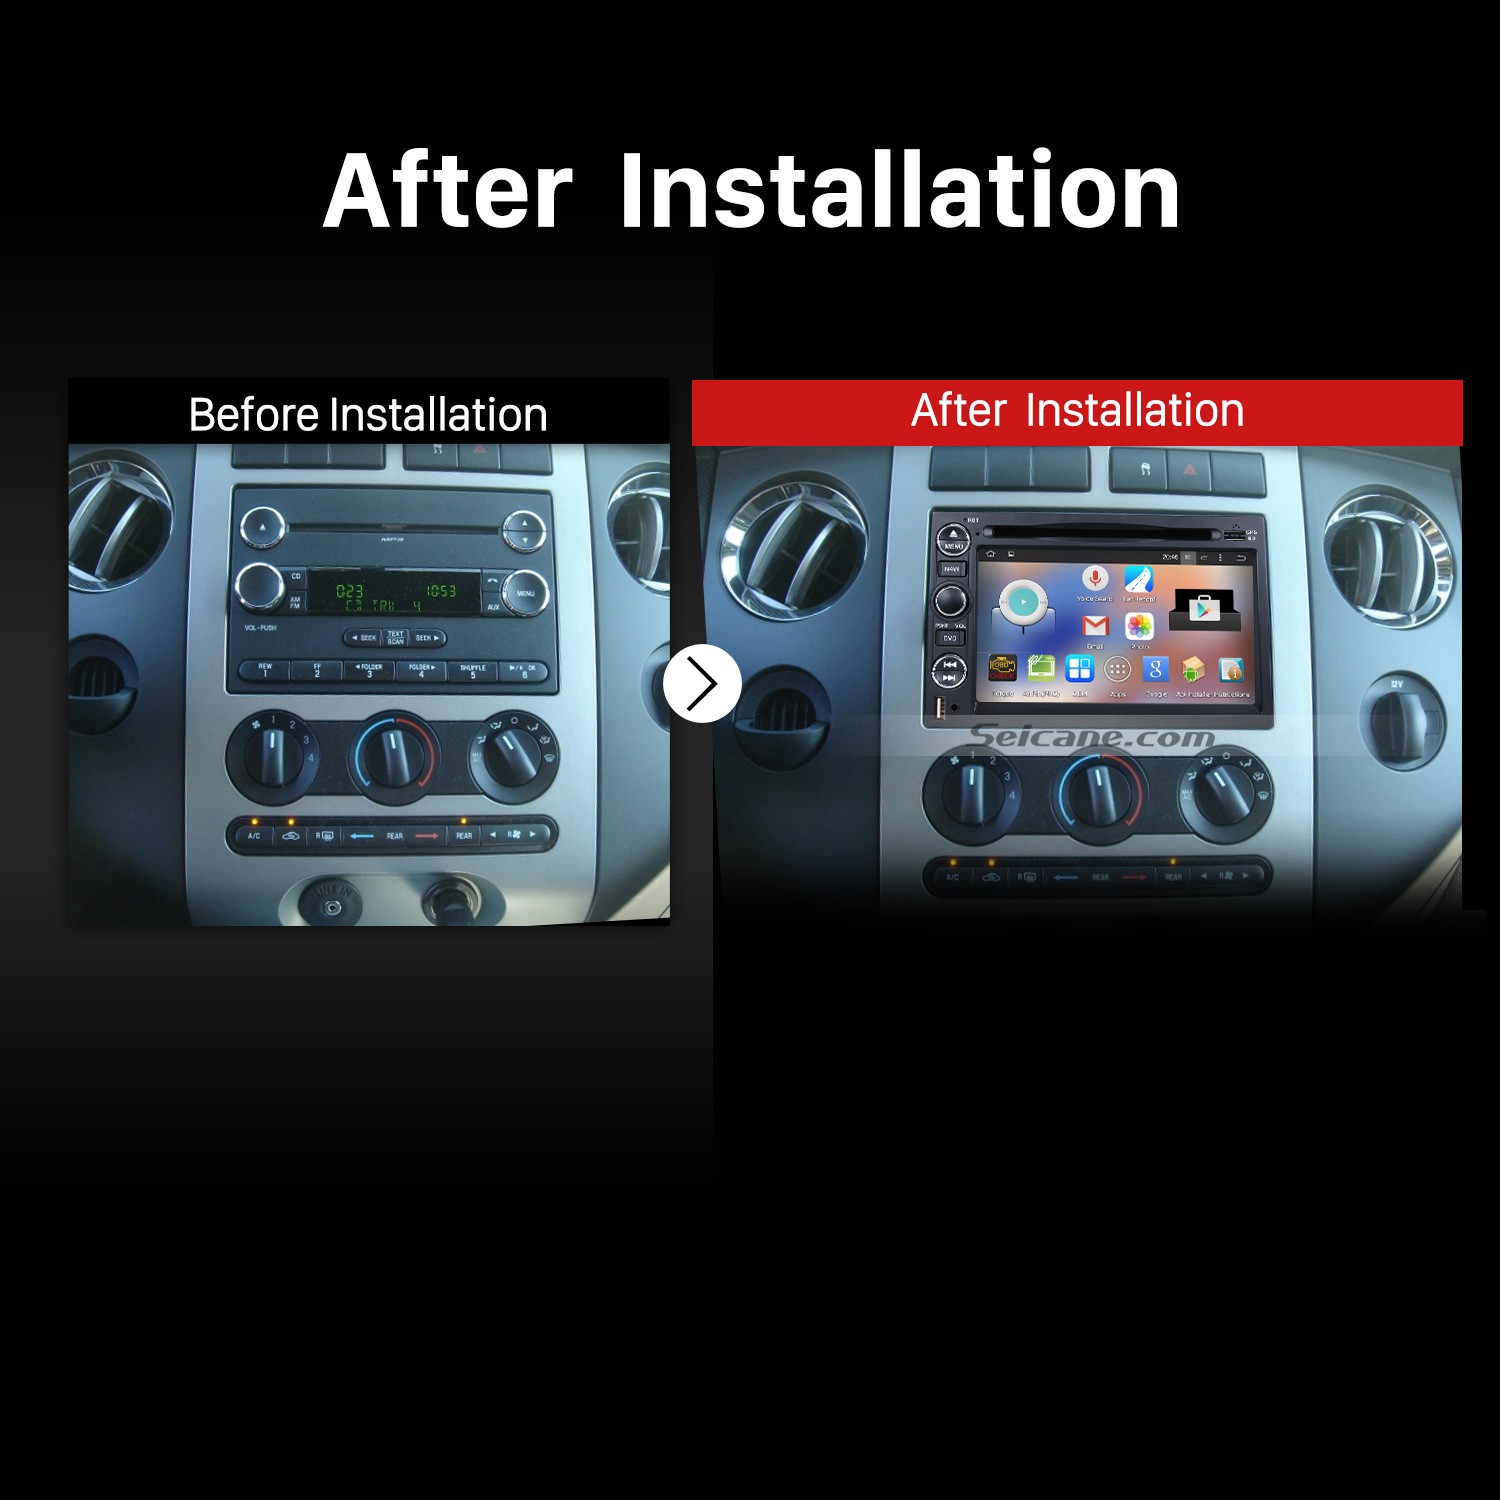
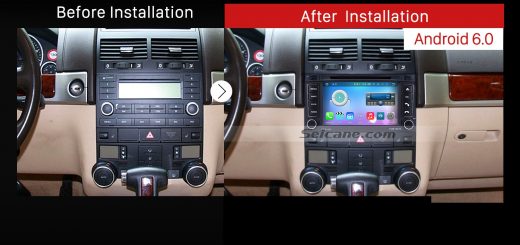
2004-2014 Ford F150 F250 F350 Stereo Head Unit after installation
Before and during installation, you should notice:
1.Before connecting, please make sure the ignition is off to avoid short circuit.
2.Ensure connect the yellow and red power cable at last.
3.Ensure that all loose wires are isolated with electrical tape
4.Ensure don’t tangle the wire when tighten the moving parts(Such as seat rails).
5.Ensure that all ground is connected to the same place.
6.Using the improper fuse may cause damage of fire, so when replace the fuse, please consult the professional.
7.For your convenience, here’s the recommended tools for removal and installation from Seicane, please check for more details: http://www.seicane.com/car-dvd-dismantling-devicesrd-400
2004-2014 Ford F150 F250 F350 head unit installation guide
Step 1: Remove the trim around gear shifter.
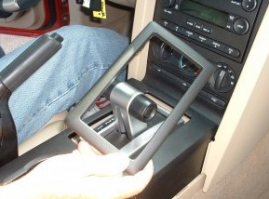
Remove the trim around gear shifter
Step 2: Remove screws securing center console lid with a screwdriver.
Remove screws securing center console lid with a screwdriver
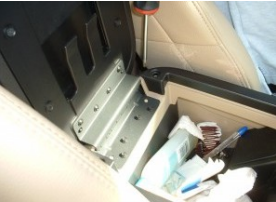
Step 3: Remove the center console trim.
Remove the center console trim
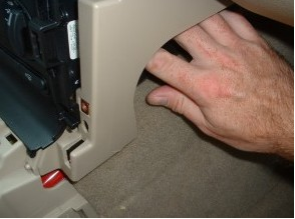
Step 4: Remove console side panels on both driver and passenger sides.
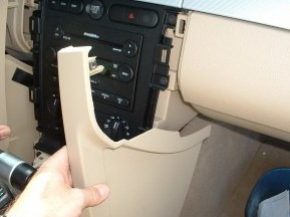
Remove console side panels on both driver and passenger sides
Step 5: Remove bolts securing radio bezel and AC controls.
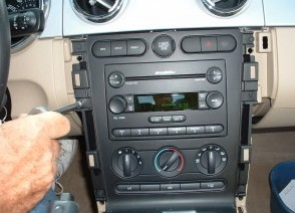
Remove bolts securing radio bezel and AC controls
Step 6: Unplug AC controls (from passenger side).
Unplug AC controls (from passenger side)
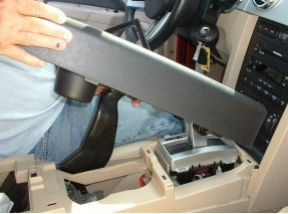
Step 7: Remove the radio bezel and AC controls.
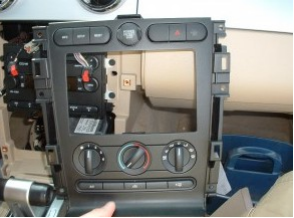
Remove the radio bezel and AC controls
Step 8: Remove screws securing radio to the vehicle, and take the original radio out of the dash.
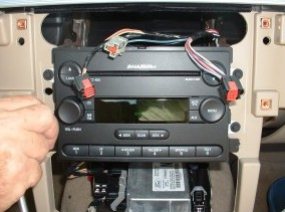
Remove screws securing radio to the vehicle, and take the original radio out of the dash
Step 9: Check all the accessories for the new Seicane head unit.
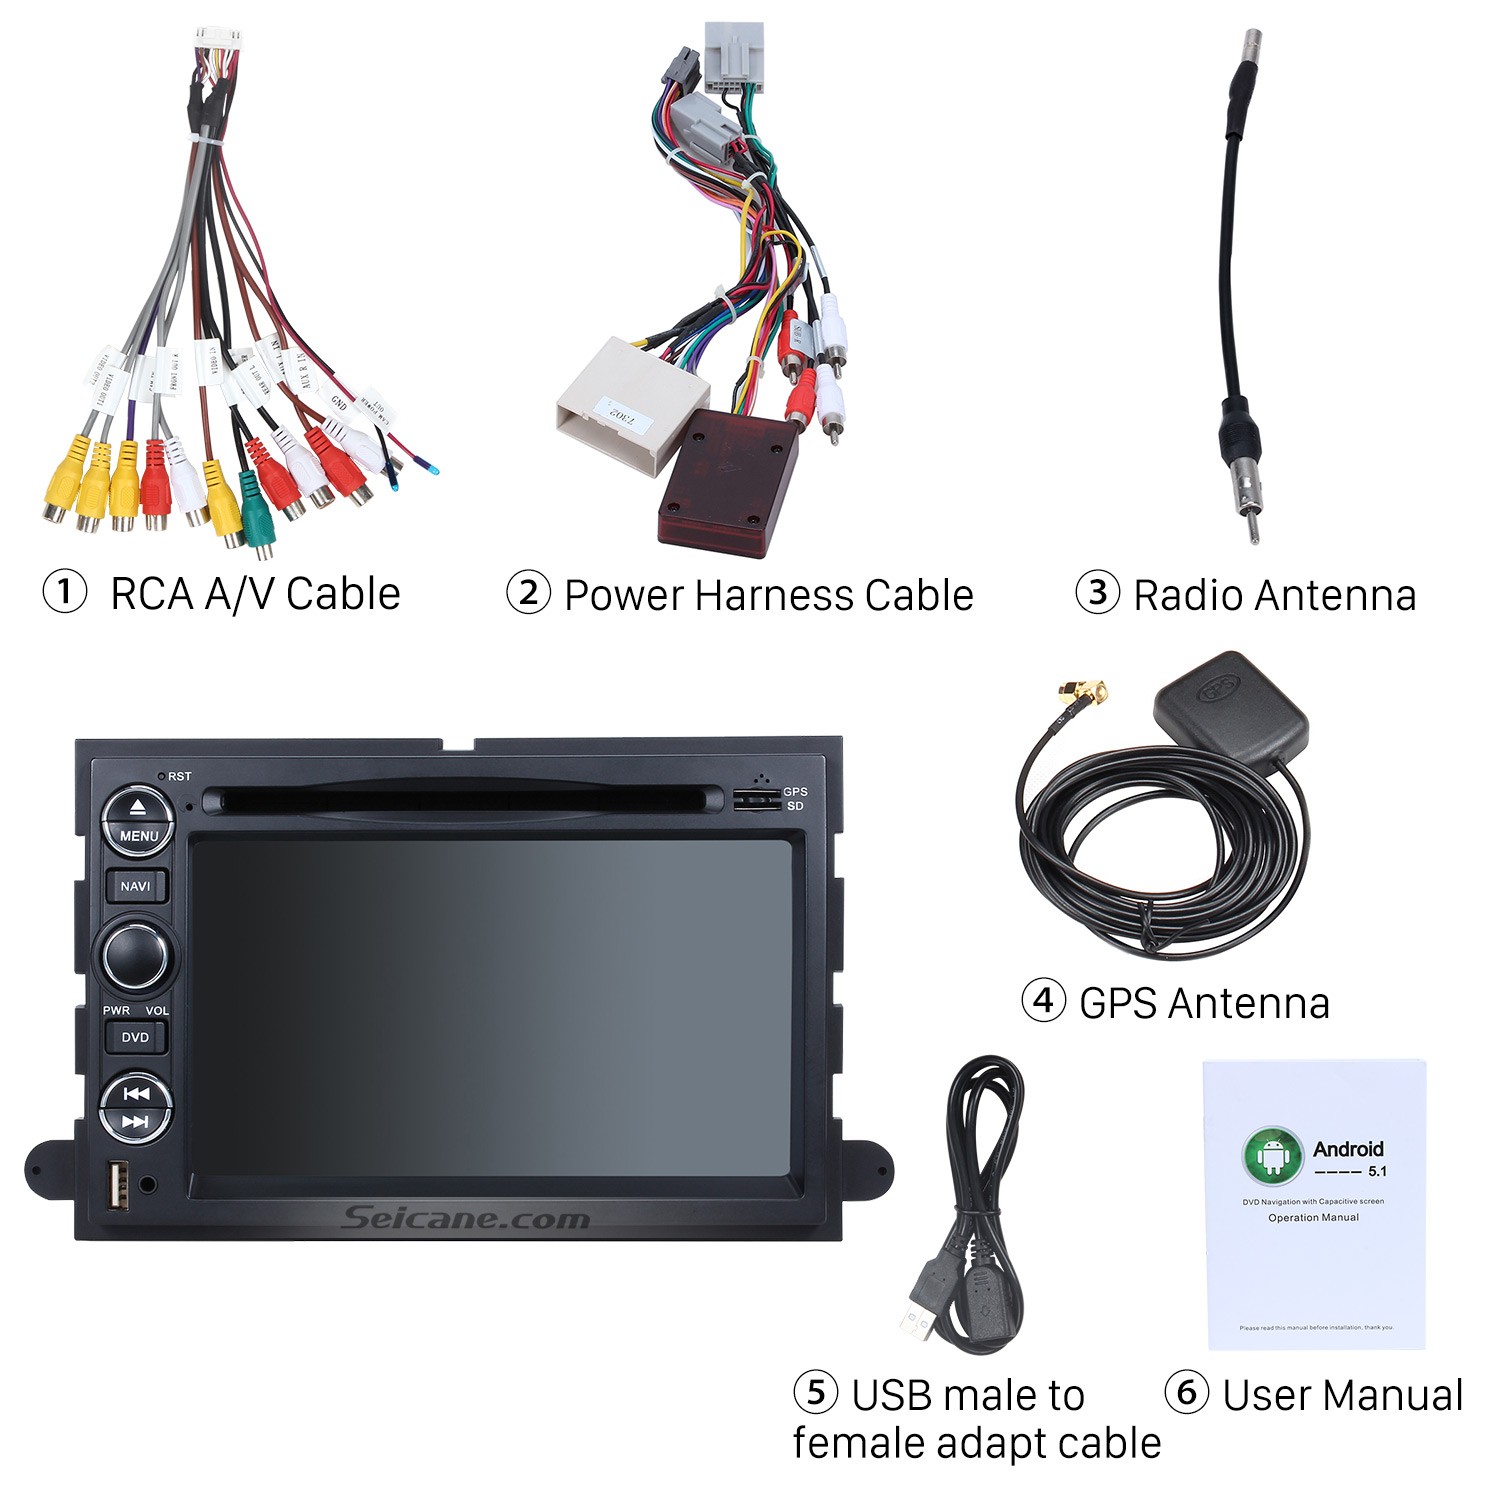
Check all the accessories for the new Seicane head unit
Step 10: Connect the harnesses to the back of the new Seicane head unit.
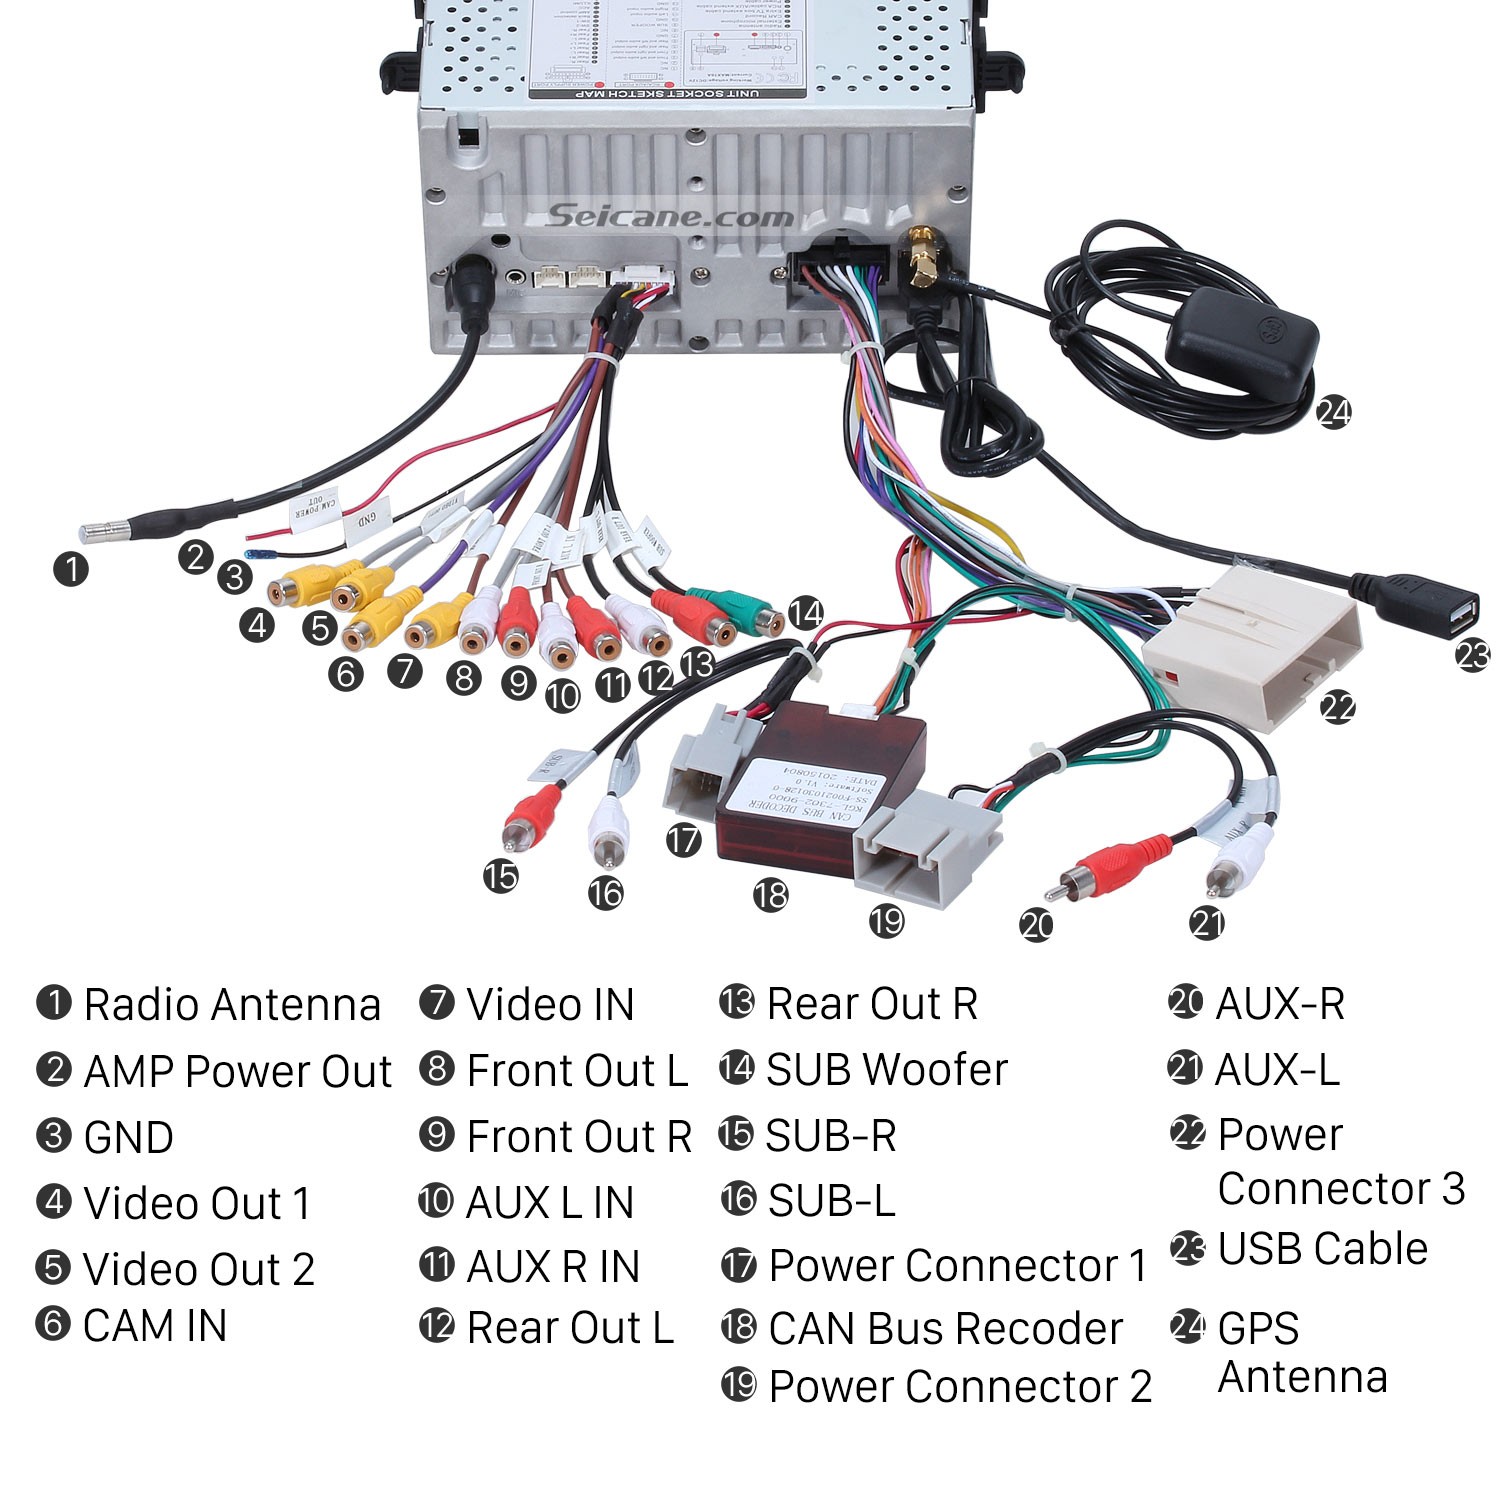
Connect the harnesses to the back of the new Seicane head unit
Step 11: Connect the Seicane head unit to your original car radio’s plugs, and put the new Seicane head unit into the dash.
Step 12: Turn on the new Seicane head unit and check whether the radio is working properly.
Step 13: Install all screws, trims, panels, bolts and the radio bezel and AC controls into their original place.
Wish the above guide can help with your installation to some extent. If there are any difficulties you cannot overcome independently, please feel free to seek help from your dealer or someone experienced. Or you can directly arrange a professional to install the head unit.
Here I’d like to recommend a great 2004-2014 Ford F150 F250 F350 head unit from Seicane to you. For more details, please click:
This smart unit is loaded with the stable Android 5.1.1 operation system, a high-quality RK3188 1.6 GHz Cortex A9 Quad-core processor and 16 GB INand Flash, which can enable you to embrace an easier, smoother and faster operation experience than before. A wide range of features are supported by this unit, including 3D GPS Navigation, Bluetooth connection, DVD player, USB/SD card connection, radio tuner, etc. Apart from these practical and entertainment features, options like HD Digital TV, DVR, OBD2, Backup Camera, etc can all be added to this device according to your needs. By making full use of these features, you are able to develop a comfortable and convenient in-car environment and have a wonderful driving experience. Wish you like it and good luck to you!


Recent Comments