A qualified car audio should not only have the practical functions but also have entertainment features, which can make you feel convenient and comfortable on the way. So do you always have a good impression at your car stereo? If you think it is not advanced enough, just read the following article and learn how to upgrade a new car stereo by yourself. The related vehicle type is a 201302014 KIA K3 Left, you can take it as reference.

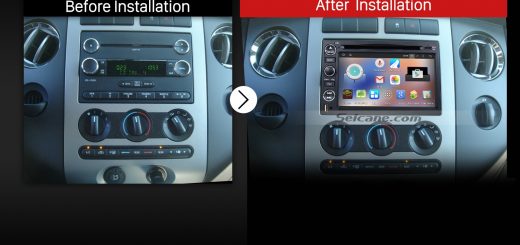
Seicane 2013 2014 KIA K3 Left dvd gps head unit after installation
Please notice before the installation:
1.Please apply the parking brake and remove the negative cable on the vehicle battery before the removal to ensure safety.
2.A lever and a screwdriver need to be prepared before the installation.
3.For your convenience, here’s the recommended tools for removal and installation from Seicane, please check for more details: http://www.seicane.com/car-dvd-dismantling-device-srd-400
2013 2014 KIA K3 Left Driving car stereo installation guide
1. Pry the side panel with a lever, and then remove it.

Pry the side panel with a lever, and then remove it
2. Remove four screws with a screwdriver.

Remove four screws with a screwdriver
3. Remove the trim panel with your hands. If necessary, you may use a lever to loosen it.

Remove the trim panel with your hands. If necessary, you may use a lever to loosen it
4. Remove four screws holding the factory radio in place with a screwdriver.

Remove four screws holding the factory radio in place with a screwdriver
5. Take the factory radio out of the dash with your hands.

Take the factory radio out of the dash with your hands
6. Unplug the connectors at the back of the factory radio.

Unplug the connectors at the back of the factory radio
7. Check all the accessories for the new Seicane car stereo.
8. Connect the harnesses to the back of the new Seicane car stereo.
9. Connect the Seicane car stereo to your original car radio ‘s plugs.
10. Turn on the new Seicane car stereo to have a careful check if everything works well. If it doesn’t, please check whether all the cables are connected correctly.
11. Put the new Seicane car stereo into the dash.
12. Put everything into their original place. All the installation is done.
Can you finish your installation procedure individually under the above installation guide? If not, don’t be too disappointed because you can seek help from your dealer or a professional. But if your car stereo is not compatible with your car, not matter how you act in your installation, the car stereo won’t work in your car. If you are search online for a suitable car stereo, you might as well check the link below for more information.
This 2013 2014 KIA K3 Left Driving car stereo radio will be one of your good choice when you decide to upgrade a new stereo. A large 8 inch multi-touch screen will facilitates your fluent operation and displays its nice visual effect. So you can easily control and apply GPS Navigation, DVD player, Bluetooth technology, Wifi and other features. Besides, you can also enjoy the entertaining features, including playing movies, music, FM/AM radio, etc. You won’t get tired of your trip with this car stereo. Wish you like it!

Recent Comments