Do you want to keep both yourself and your passengers entertained on all trips? If you say yes, then you can easily count on replacing your factory radio with a multifunctional car stereo which can support a large amount of entertainment features for you to relax in your car. After getting an ideal head unit, you can install it in your car with a detailed installation instruction. Here is a step-by-step 2005-2012 BMW 3 Series E90 E91 E92 E93 radio from Seicane for you as a reference.

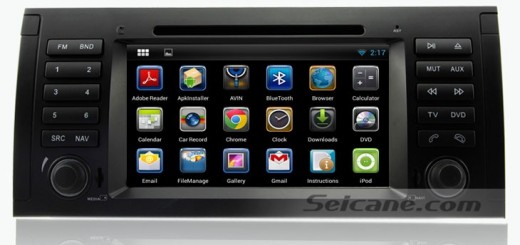
2005-2012 BMW 3 Series E90 E91 E92 E93 radio after installation
Precautions for this installation:
1.Before you start up any work, park your car well and unplug the negative power cable to avoid any danger.
2.Please make sure that all fastened wires are isolated with electrical tape.
3.Please make sure the ignition is off to avoid short circuit.
2005-2012 BMW 3 Series E90 E91 E92 E93 radio installation guide
- The original dashboard before installation.

1. The original dashboard before installation

- Pry the panel off with a lever. You need to lift the air-conditioning assembly and don’t pry the air-conditioning panel off directly.

2. Pry the panel off with a lever. You need to lift the air-conditioning assembly and don’t pry the air-conditioning panel off directly.
- Unplug the air-conditioning assembly. Then unscrew the CD player and pull the CD player out.

3-1.Unplug the air-conditioning assembly. Then unscrew the CD player and pull the CD player out.

3-2.Unplug the air-conditioning assembly. Then unscrew the CD player and pull the CD player out.


- Disconnect the power plug behind the CD player and the plug of the radio aerials.

4-1. Disconnect the power plug behind the CD player and the plug of the radio aerials.

4-2. Disconnect the power plug behind the CD player and the plug of the radio aerials.


- Take off the plastic bracket frame behind the CD Player. Six screws are shown in the picture as follow. 4 of them are T20 screws, 2 of them are turnbuckles(no.8).

5. Take off the plastic bracket frame behind the CD Player. Six screws are shown in the picture as follow. 4 of them are T20 screws, 2 of them are turnbuckles(no.8).

- Unscrew the 2 turnbuckles(no.8).After the removal, the bracket is not needed, because the DVD comes with its metal bracket panel.

6. Unscrew the 2 turnbuckles(no.8).After the removal, the bracket is not needed, because the DVD comes with its metal bracket panel.
- Mount the metal bracket panel of DVD to the position where the factory CD bracket panel is dismounted. Screw the 4T20 screws on.

7-1.Mount the metal bracket panel of DVD to the position where the factory CD bracket panel is dismounted. Screw the 4T20 screws on.

7-2.Mount the metal bracket panel of DVD to the position where the factory CD bracket panel is dismounted. Screw the 4T20 screws on.


- Connect the power plugs of DVD player and the CD player. Then connect the wires to the new Seicane radio as t he user manual or the wiring diagram shows.

8-1. Connect the power plugs of DVD player and the CD player. Then connect the wires to the new Seicane radio as t he user manual or the wiring diagram shows.

8-2. Connect the power plugs of DVD player and the CD player. Then connect the wires to the new Seicane radio as t he user manual or the wiring diagram shows.


- Turn on the new Seicane radio to have a careful check if everything works well. If it doesn’t, please check whether all the cables are connected correctly.
10.Put the new Seicane radio into the dash.
- Put everything into their original place.
Above all, it’s necessary for you to make clear every step before you start to install your new 2005-2012 BMW 3 Series E90 E91 E92 E93 radio. If you have any question, then you can turn to your dealer or a professional for help. To ensure you have a successful installation, you need to make sure your new radio can be compatible with your car. If you don’t know about this, you are welcome to check out this great Seicane BMW 3 Series E90 E91 E92 E93 radio with the following link for more details:
Ease your eyes and simplify your operation with this high-end BMW 3 Series E90 E91 E92 E93 radio in your car. It comes with an amazing large 7 inch touch screen to simplify the operation. The worldwide real-time GPS can be helpful for you get to any unfamiliar location on time. A journey with safety and pleasure can be easily accessible for you when you wirelessly connect with your enabled cell phone via bluetooth feature.
Wish you like this wonderful BMW 3 Series E90 E91 E92 E93 radio on all your trips. Good luck to you!

Recent Comments