Undoubtedly, in modern life, an ideal car radio plays a very important role in the car, because it is compatible with many functions to meet your different needs and give you an unforgettable driving experience. If you are tired of the old factory radio that can’t keep up with the times, you can consider installing a brand new multi-functional car radio to replace your factory radio. The following is a description of the installation of the 2013 2014 2015 2016 2017 2018 Toyota RAV4 car radio from Seicane.
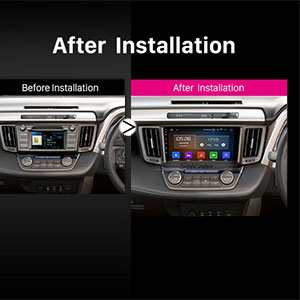
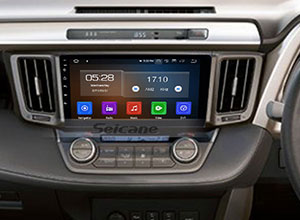
2013 2014 2015 2016 2017 2018 Toyota RAV4 car radio after installation
Tips about the installation:
1. Please disconnect the power before the installation.
2. Please prepare a lever and a screwdriver before the removal and the installation.
3. Please keep all the separate parts from the car. Please take great care of the dashboard to avoid scratching it during its detachment and installation. Please keep handy any parts from the car and make use of all the original screws from the car as much as possible. so each related part of the unit can be fixed securely.
4. For your convenience, here’s the recommended tools for removal and installation from Seicane, please check for more details: http://www.seicane.com/car-dvd-dismantling-device-srd-400
2013 2014 2015 2016 2017 2018 Toyota RAV4 Bluetooth Touchscreen GPS Navigation System Installation Instruction
1. The dashboard of the original car.
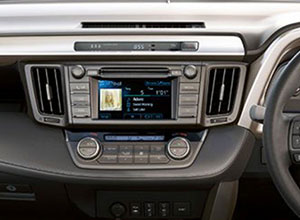
The dashboard of the original car.
2. Please pry loose and take out the decorative strip.
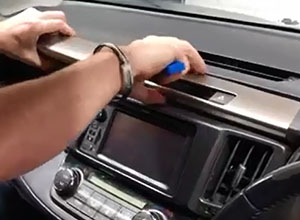
Please pry loose and take out the decorative strip.
3. Pry loose this part.
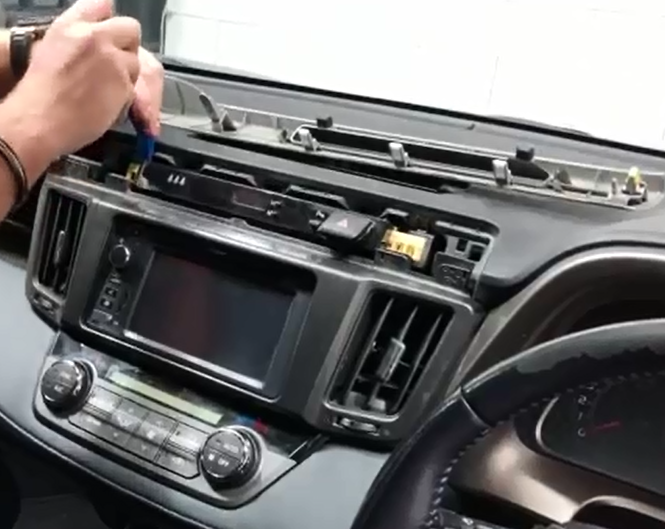
Pry loose this part.
4. Take out this part of the original car and disconnect it.
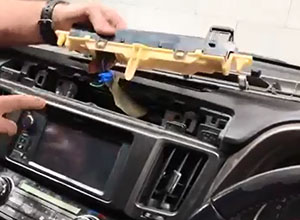
Take out this part of the original car and disconnect it.
5. Pry loose the left air vent.
Pry loose the left air vent.
6. Gently take out left air vent.
Gently take out left air vent.
7. The same to right vent.
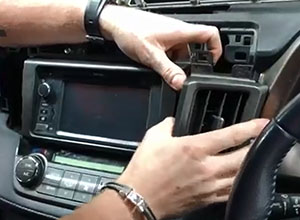
The same to right vent.
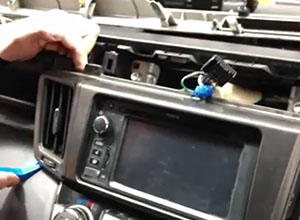
8. Undo the bolts fixed on hosting machine.
Undo the bolts fixed on hosting machine.
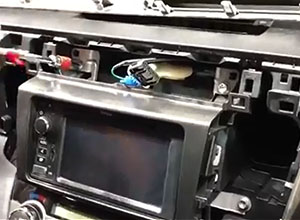
9. Take out the hosting machine.
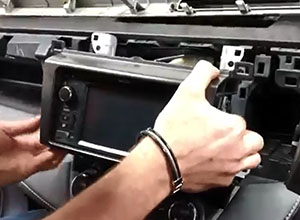
Take out the hosting machine.
10. Disconnect the hosting machine.

Disconnect the hosting machine.
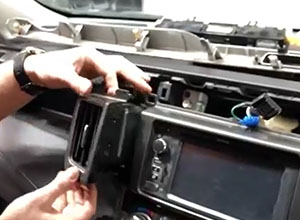
11. Take out the bracket from the original hosting machine.
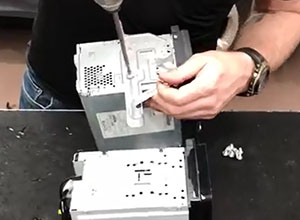
Take out the bracket from the original hosting machine.
12. Put the bracket on the new Seicane touch screen.
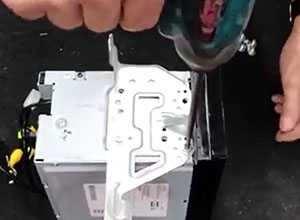
Put the bracket on the new Seicane touch screen.
13. Check all the accessories for the new Seicane car radio.

Check all the accessories for the new Seicane car radio.
14. Plug in all the connection lines and install the new Touch Screen.
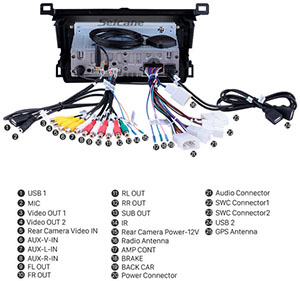
Plug in all the connection lines and install the new Touch Screen.
15. Turn on the new Seicane car radio to have a careful check if everything works well. If it doesn’t, please check whether all the cables are connected correctly.
16. Put the new Seicane car radio into the dash.
17. Put everything into their original place. All the installation is done.
Put everything into their original place. All the installation is done.
I hope that you can get some help from the above installation for 2013 2014 2015 2016 2017 2018 Toyota RAV4 car radio. There may be some problems during the entire installation process. If you don’t have any experience with this, you’d better ask a professional for help. If you are still looking for the right head unit for your car, I would like to recommend you a top 2013 2014 2015 2016 2017 2018 Toyota RAV4 car radio from Seicane. Please click for more details:
This top-of-the-line unit features a large inch touch screen design with high-precision navigation and an amazing 1024 * 600 pixel screen resolution, making the discs and videos played on this remarkable system show a clear perspective. This all-in-one car radio features navigation, Bluetooth, DVD, radio tuner and file management to bring you more entertainment and convenience to long-distance drivers.
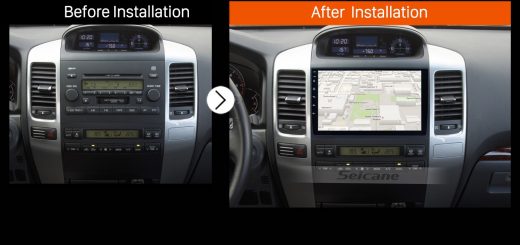
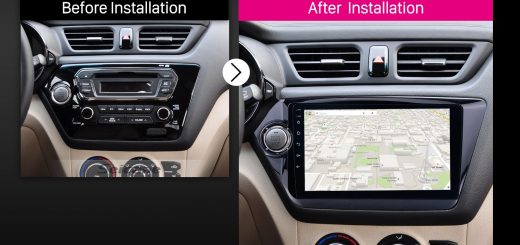
It is designed according to the original panel of the car, so the car radio can be installed your car seamlessly, without adding additional mounting frames or cutting any wires for installation, just remove your factory unit and unplug the power cord, and then connect our device and push it into the dashboard, that’s it.
I hope you like it and enjoy good day!

Recent Comments