To relax yourself, your families or friends in car, it is a wise choice for you to install a multifunctional car stereo which allows you to enjoy your favorite music, TV programs, videos, etc. If your old factory radio cannot be compatible with such entertainment features, you need to replace it with a new aftermarket car stereo. Today I would like to introduce some installation steps to install a car stereo for 2003-2011 VW Volkswagen Scirocco Golf Polo Passat Jetta Tiguan Touran Sharan Sagita Caddy Cupra Seat Toledo Leon Alhambra. If you own the same car model, you may refer to the following installation steps.
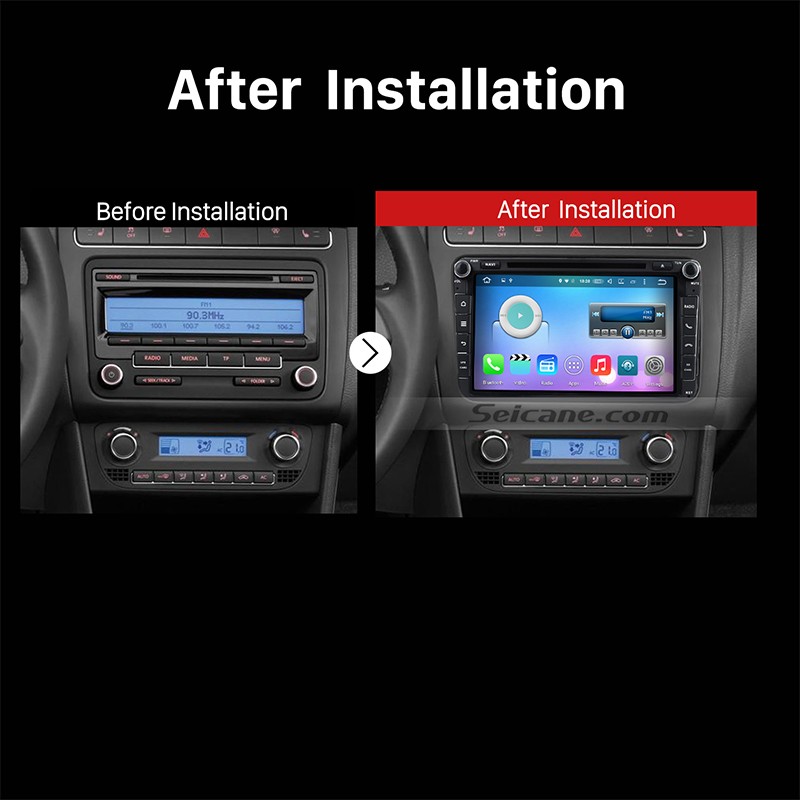
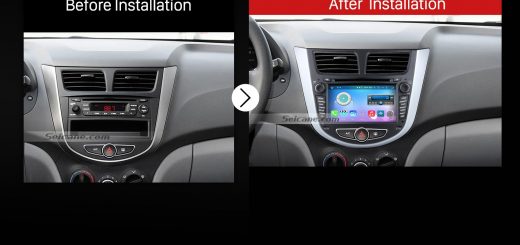
2003-2011 VW Volkswagen Scirocco Golf Polo Passat Jetta Tiguan car stereo after installation
Some tips before the installation:
1. Please disconnect the power before the installation.
2. Please prepare a lever and a screwdriver before the removal and the installation.
3. Please keep all the separate parts from the car. Please take great care of the dashboard to avoid scratching it during its detachment and installation. Please keep handy any parts from the car and make use of all the original screws from the car as much as possible. so each related part of the unit can be fixed securely.
4. For your convenience, here’s the recommended tools for removal and installation from Seicane, please check for more details: http://www.seicane.com/car-dvd-dismantling-device-srd-400
2003-2011 VW Volkswagen Scirocco Golf Polo Passat Jetta Tiguan Touran Sharan Sagita Caddy Cupra Seat Toledo Leon Alhambra car stereo installation steps
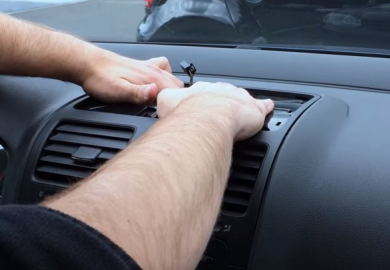
1. Remove the top panel with a lever.
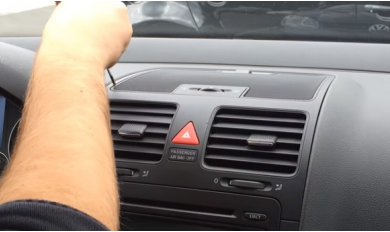
Remove the top panel with a lever
2. Disconnect the connector at the back of the panel.
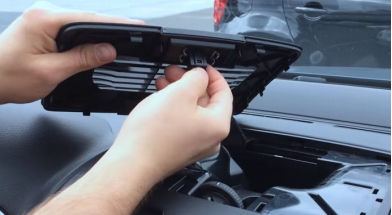
Disconnect the connector at the back of the panel
3. Unscrew the screw with a screwdriver.
Unscrew the screw with a screwdriver
4. Remove the metal sheet on the top with your hands.
Remove the metal sheet on the top with your hands
5. Unscrew two screws circled in red shown as follows under the metal sheet.
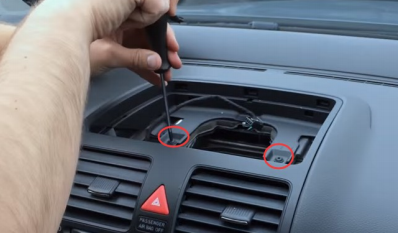
Unscrew two screws circled in red shown as follows under the metal sheet
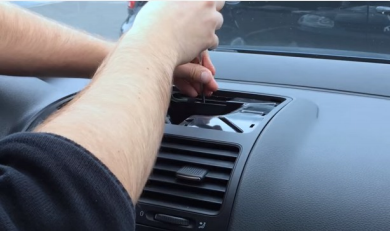
6. Remove the air conditioner vent with your hands.
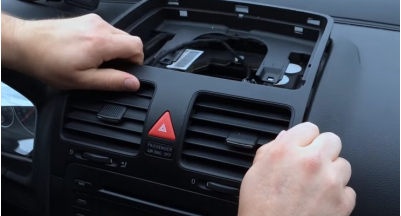
Remove the air conditioner vent with your hands
7. Unscrew two screws under the vent with a screwdriver.
Unscrew two screws under the vent with a screwdriver
8. Remove the panel on the original car radio.
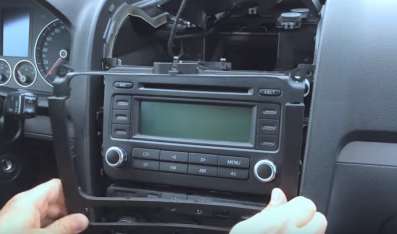
Remove the panel on the original car radio
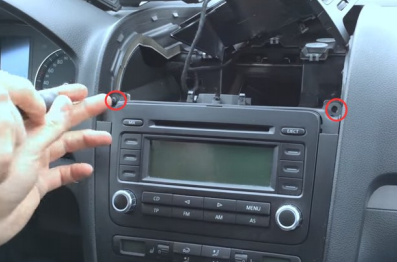
9. Unscrew four screws holding the original car radio with a screwdriver.
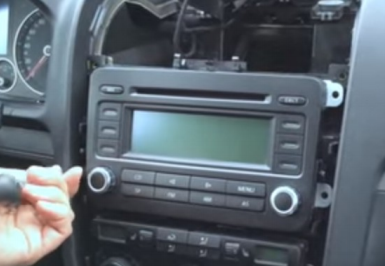
Unscrew four screws holding the original car radio with a screwdriver
10. Take the original car radio out of the dash.
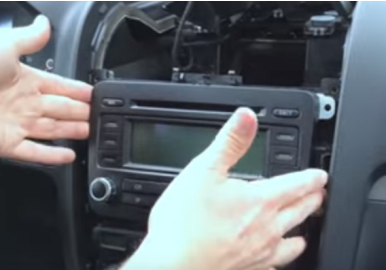
Take the original car radio out of the dash
11. Disconnect all the connectors at the back of the original car radio.
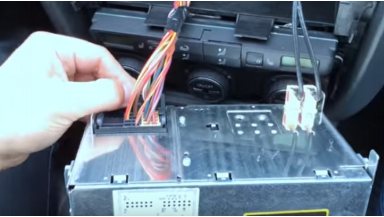
Disconnect all the connectors at the back of the original car radio
12. Check all the accessories for the new Seicane car stereo.
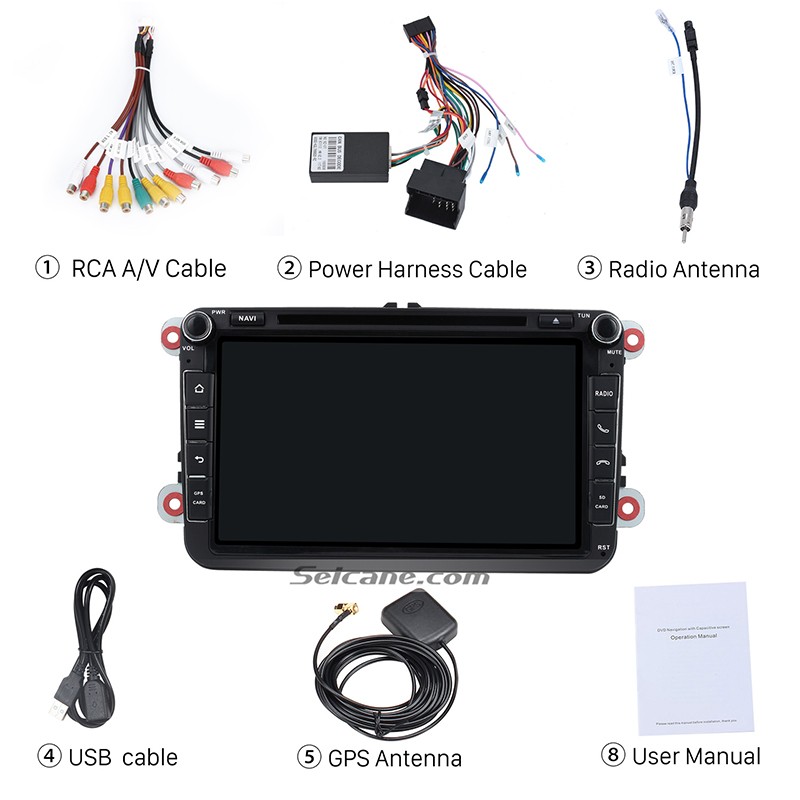
Check all the accessories for the new Seicane car stereo
13. Connect the harnesses to the back of the new Seicane car stereo.
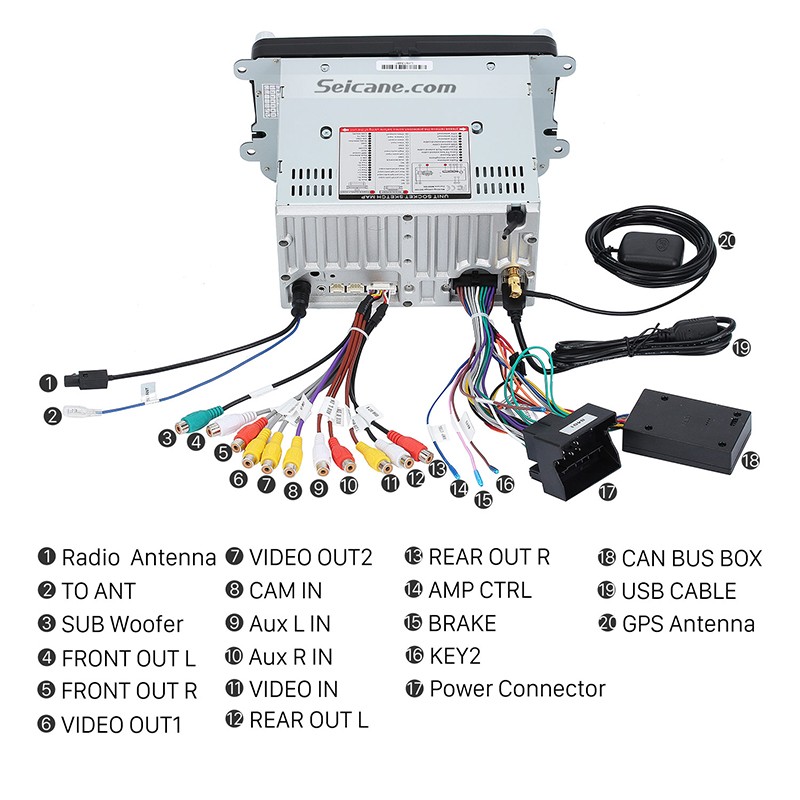
Connect the harnesses to the back of the new Seicane car stereo
14. Connect the Seicane car stereo to your original car radio’s plugs.
15. Turn on the new Seicane car stereo to have a careful check if everything works well. If it doesn’t, please check whether all the cables are connected correctly.
16. Put the new Seicane car stereo into the dash.
17. Put everything into their original place.
Wish you can get some help from the above installation steps. If you cannot totally understand these steps, you can contact your dealer for seeking advice or turn to a professional for help. Besides, it is very crucial for you to select an ideal car stereo for your beloved car. If you don’t which kind of car stereos can be compatible with your car, I’d like to recommend an amazing car stereo from Seicane for 2003-2011 VW Volkswagen Scirocco Golf Polo Passat Jetta Tiguan Touran Sharan Sagita Caddy Cupra Seat Toledo Leon Alhambra. Here comes the related link, please click:
This amazing car stereo is loaded with the latest Android 6.0 operation system, a high-quality 8-Core 1.5 GHz RK-PX5 A53 processor and 2GB RAM with great performance and capacities. With an 8 inch HD multi-touch screen with 1024*600 pixels, you are able to enjoy this unit’s smooth operation, high sensitivity and abundant interaction for the better view of your road ahead.
Thanks to the high-end GPS navigation system, even you are in an unfamiliar place, you can easily know your current locations and accurately get the most suitable route option to get to your desired destinations according to turn-by-turn directions and voice prompts.
As for entertainment options, you can make full use of its function as a DVD player to play whatever you like to relax both yourself and your passengers, such as TV programs, videos, movies and so on.
What are you waiting for? Just install this excellent unit in your car right now and wish you have a brand new driving experience from now on!

Recent Comments