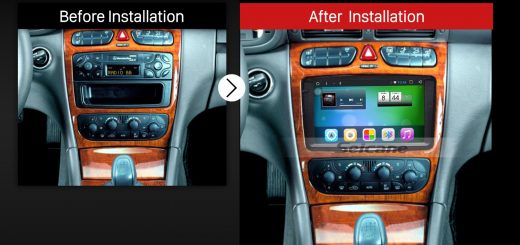
To reduce some budget on the replacement or your factory radio, you can try to finish the upgrade process by yourself. Under this circumstance, you can find a related installation instruction to guide you to remove the factory radio and install the new car radio on your own. The following is a 2007 2008 2009 2010 2011-2016 MAZDA CX-9 car radio installation instruction from Seicane, which can be taken as your reference is you have the same or similar dashboard.

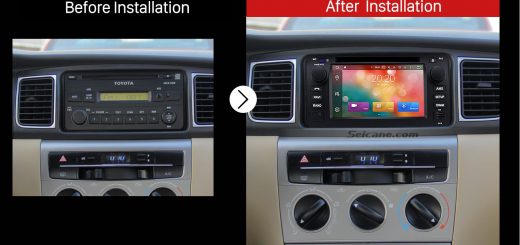
2007 2008 2009 2010 2011-2016 MAZDA CX-9 Car Radio after installation
Tips about the installation:
1. Please disconnect the power before the installation.
2. Please prepare a lever and a screwdriver before the removal and the installation.
3. Please keep all the separate parts from the car. Please take great care of the dashboard to avoid scratching it during its detachment and installation. Please keep handy any parts from the car and make use of all the original screws from the car as much as possible. so each related part of the unit can be fixed securely.
4. For your convenience, here’s the recommended tools for removal and installation from Seicane, please check for more details: http://www.seicane.com/car-dvd-dismantling-device-srd-400
2007 2008 2009 2010 2011-2016 MAZDA CX-9 car radio installation instruction from Seicane
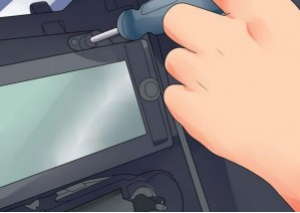
1. Remove the original panel with a plastic knife, pry gently along the gap and pick up the panel, then remove it and then set it aside.
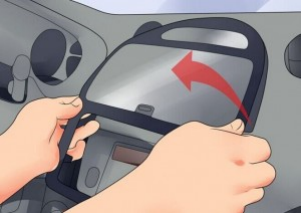
Remove the original panel with a plastic knife, pry gently along the gap and pick up the panel, then remove it and then set it aside
2. Remove screws that fixed the radio on the dashboard.
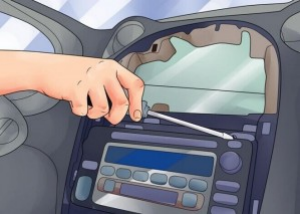
Remove screws that fixed the radio on the dashboard
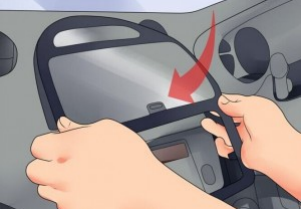
3. Pull the factory radio out of the dash. Pull it with medium force, as the wires are connected to the radio.
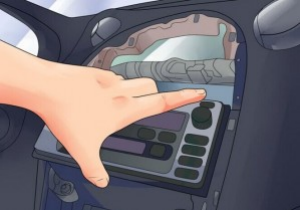
Pull the factory radio out of the dash. Pull it with medium force, as the wires are connected to the radio
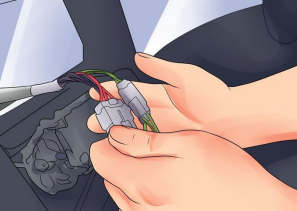
4. Unplug the connectors at the back of the factory radio.
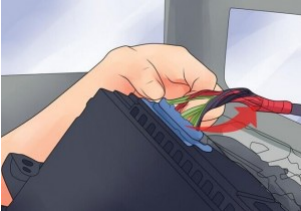
Unplug the connectors at the back of the factory radio
5. Make antennas and cables connected step by step, and you should be very careful when you are doing this for it will affect whole procedure.
Make antennas and cables connected step by step, and you should be very careful when you are doing this for it will affect whole procedure
6. Put the new Seicane radio into your car, you should check whether your connections are correct, and you’d better have a tidy for the cables.
7. If everything is OK, firm screws into their original place.
If everything is OK, firm screws into their original place
8. Firm the panel on the new Seicane radio. Finally the new Seicane radio is installed and a comprehensive test should be conducted on the new radio.
Firm the panel on the new Seicane radio. Finally the new Seicane radio is installed and a comprehensive test should be conducted on the new radio
Wish the above installation instruction can be helpful for you. If you have any doubts, you can consult your dealer, communicate with someone experienced or turn to a professional technician for help. Or you can directly ask a professional technician to help you install the new car radio. While for the selection of an ideal car radio, here I would like to share an amazing 2007 2008 2009 2010 2011-2016 MAZDA CX-9 car radio from Seicane with you. You may check out the following link for more details.
This car radio is running on the most advanced and stable Android 7.1.2 operation system and a high-quality quad-core CPU processor. So with it installed in your car, you can enjoy a much smoother, faster and easier operation experience.
Even you don’t have a good sense of direction, you can quickly locate where you are and navigate to your desired destinations through accurate turn-by-turn directions and voice prompts provided by the high-precision 3D GPS navigation system.
Besides, through the Bluetooth connection between your Bluetooth-enabled mobile phone and this car radio, you can dial, answer, reject and mute hands-free calls as well as listen to Bluetooth streaming music.
Wish you like this unit and good luck to you!

Recent Comments