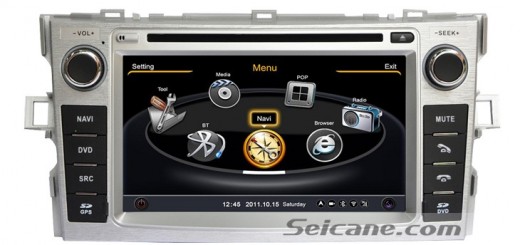
Many car owners want to replace their factory radio with a new multifunctional car stereo. However, not every one knows how to install it. Here I’d like to introduce a step-by-step installation guide about a Toyota CAMRY car stereo to you. Please look at the picture below, it’s an amazing 2007-2011 Toyota CAMRY car stereo from Seicane. If you also have the same dashboard, then you can take this article as a reference.
Precautions for this installation:
1.Before you start up any work, park your car well and unplug the negative power cable to avoid any danger.
2.Please make sure that all fastened wires are isolated with electrical tape.
3.Please make sure the ignition is off to avoid short circuit.
2007-2011 Toyota CAMRY car stereo installation guide
- Unscrew the shift knob with your hands.
- Remove two side panels with your hands, and set them aside.
- Remove the panel beneath the brake with your hands.
- Unplug the connectors at the back of the panel.
- Remove the whole plastic panel under the brake with your hands.
- Unplug the connector at the back of the panel.
- Unscrew the screws with a screwdriver.
- Take the pocket out of the dashboard.
- Unplug the connectors at the back of the pocket.
- Unscrew two screws beneath the factory radio.
- Remove the vent with a panel removal tool.
- Unscrew the connector at the back of the vent.
- Unscrew the screws holding the radio in place.
- Take the factory radio out of the dashboard.
- Disconnect the connectors at the back of the radio.
- Make antennas and cables connected step by step as installation instructions show, and you should be very careful when you are doing this for it will affect whole procedure.
- Put the new Seicane stereo into your dashboard, you should check whether your connections are correct, the new unit is in right position, and you’d better have a tidy for the cables.
- Check whether the new Seicane stereo is working without problem.
- If there is no problem, firm removed screws and bolts that are put aside, then make trim panel back on your new Seicane stereo.
Can you install a new stereo on your own after reading the above installation guide? If you find it too difficult for you to do it on your own, you can ask a professional for help. On the other hand, you need to make sure that your new stereo can fit your car well, so that it can work well with your car. If you don’t have one, I’d like to recommend an intelligent 2007-2011 Toyota CAMRY car stereo from Seicane to you, please click:
This Toyota CAMRY car stereo is integrated with an amazing DVD player and an accurate GPS navigation system. The region-free DVD disk player allows you to play any DVD from every country in the world to keep your passengers entertained in a long trip. To wirelessly link with your Bluetooth-enabled cell phone, you can easily get access to hands-free calls and stream music to make your driving safe and relaxed.


Recent Comments