Are you searching online for an easy-to-understand installation guide for your 2008-2014 Toyota Highlander head unit? If yes, then I would like to congratulate you for finding that. Because next, I would like to share you a detailed 2008-2014 Toyota Highlander gps Sat Navi stereo installation guide from Seicane with you. You may refer to it so as to help with your installation.

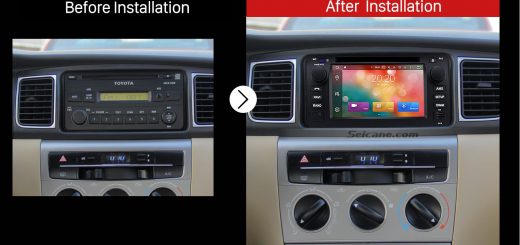
2008-2014 Toyota Highlander gps Sat Navi stereo after installation
Some tips before the installation:
1.Please disconnect the power before the installation.
2.Please prepare a lever and a screwdriver before the removal and the installation.
3.Please keep all the separate parts from the car. Please take great care of the dashboard to avoid scratching it during its detachment and installation. Please keep handy any parts from the car and make use of all the original screws from the car as much as possible. so each related part of the unit can be fixed securely.
4.For your convenience, here’s the recommended tools for removal and installation from Seicane, please check for more details: http://www.seicane.com/car-dvd-dismantling-device-srd-400
2008-2014 Toyota Highlander head unit installation guide
1. Remove the bottom panel with a plastic knife.

Remove the bottom panel with a plastic knife
2. Pry the top of the original radio panel with a plastic knife.

Pry the top of the original radio panel with a plastic knife
3. Remove four screws holding the factory radio with a screwdriver.

Remove four screws holding the factory radio with a screwdriver
4. Take the factory radio out of the dashboard.

Take the factory radio out of the dashboard
5. Pull out the connectors at the back of the factory radio.

Pull out the connectors at the back of the factory radio
6. Check all the accessories for the new Seicane head unit.

Check all the accessories for the new Seicane head unit
7. Connect the harnesses to the back of the new Seicane head unit.

Connect the harnesses to the back of the new Seicane head unit
8. Connect the Seicane head unit to your original car radio ‘s plugs and put the new Seicane head unit into the dash.
9. Turn on the new Seicane head unit and check whether the radio is working properly.
10. Firm all screws and the panels into their original place.
Before the installation, please make clear every step. If you have any question, you can consult your dealer or ask a professional for help. What is more, it is essential for you to check if your new head unit fits well with your car. If it is not ideal enough, it may have some influence on your installation. For a better installation, I’d like to recommend an amazing 2008-2014 Toyota Highlander gps Sat Navi stereo from Seicane to you. Please click:
This great head unit for 2008-2014 Toyota Highlander, compatible with a wide range of features, will meet your various needs. The car steering wheel still remains its original functions after the head unit installation. After installation, you are possible to get access to such features, including 3D GPS navigation of high accuracy, Bluetooth streaming music, Bluetooth hands-free calls, DVD player, FM/AM radio, DVD, Backup camera, etc. Wish you like it and don’t hesitate to add it to your cart!


Recent Comments