Are you desire a more comfortable car interior environment? If yes, then it’s wise of you to consider to replace your factory radio with a new head unit which can support quite a lot of features to offer the greatest convenience and enjoyment. Finding an ideal car stereo, you’d better search for a detailed installation guide to help with the installation. Here I’d like to share a professional 2006-2013 BMW Mini Cooper S D head unit installation guide from Seicane with you. Hopefully it can be helpful for you.

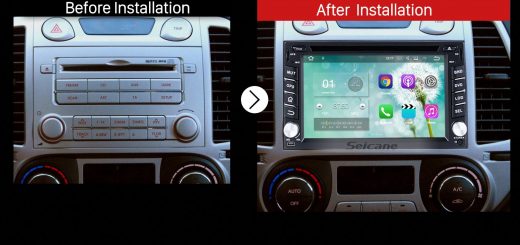
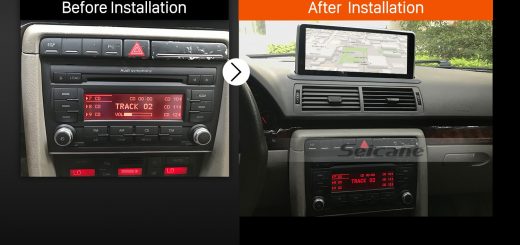
2006-2013 BMW Mini Cooper S D head unit after installation
Before and during installation, you should notice:
1.Before connecting, please make sure the ignition is off to avoid short circuit.
2.Ensure connect the yellow and red power cable at last.
3.Ensure that all loose wires are isolated with electrical tape
4.Ensure don’t tangle the wire when tighten the moving parts(Such as seat rails).
5.Ensure that all ground is connected to the same place.
6.Using the improper fuse may cause damage of fire, so when replace the fuse, please consult the professional.
7.For your convenience, here’s the recommended tools for removal and installation from Seicane, please check for more details: http://www.seicane.com/car-dvd-dismantling-device-srd-400
2006-2013 BMW Mini Cooper S D head unit installation guide
1.Remove two tabs in the air conditioning vent above the dash.

Remove two tabs in the air conditioning vent above the dash
2.Remove the tachometer and set it aside.

Remove the tachometer and set it aside
3.Remove the crew pocket panel with a lever, then put it aside.

Remove the crew pocket panel with a lever, then put it aside
4.Open the glove box compartment, and remove the panel inside shown as the picture.

Open the glove box compartment, and remove the panel inside shown as the picture
5.Pop out the panel beneath the steering wheel with a lever and your hands.

Pop out the panel beneath the steering wheel with a lever and your hands
6.Remove the side panel with a lever and your hands.

Remove the side panel with a lever and your hands
7.Remove the other side panel shown as the picture with a lever.

Remove the other side panel shown as the picture with a lever
8.Remove the panel under the air-conditioning control with a lever.

Remove the panel under the air-conditioning control with a lever
9.Unscrew all the screws holding the plastic cover with a screwdriver.

Unscrew all the screws holding the plastic cover with a screwdriver
10.Remove the panel on the factory radio with your hands.

Remove the panel on the factory radio with your hands
11.Remove the plastic cover of the whole air conditioning control.

Remove the plastic cover of the whole air conditioning control
12.Disconnect the connectors at the back of the cover.

Disconnect the connectors at the back of the cover
13.Unscrew all screws holding the factory radio with a screwdriver.

Unscrew all screws holding the factory radio with a screwdriver
14.Gently take the factory radio out of the dashboard.
15.Check all the accessories for the new Seicane head unit.

Check all the accessories for the new Seicane head unit
16.Connect the harnesses to the back of the new Seicane head unit.

Connect the harnesses to the back of the new Seicane head unit
17.Connect the Seicane head unit to your original car radio ‘s plugs.
18.Check whether the new Seicane head unit is working without problem.
19.If there is no problem, firm removed screws and bolts that are put aside, then make trim panel back on your new Seicane head unit.
Are you able to understand all the removal and installation steps specially for the 2006-2013 BMW Mini Cooper S D head unit? If not, it’s suggested you turn to your dealer for help. Please make clear every step before the installation. By the way, do you find an ideal head unit for you car? If not, it’s wise of you to take this amazing 2006-2013 BMW Mini Cooper S D head unit from Seicane into consideration. Here’s the link, please click for more details:
This superior BMW Mini Cooper S D head unit is in high quality with 7 inch high definition touch screen brilliance (1024*600 pixel resolution) and multimedia options like digital TV for front of the line in-car entertainment and all the functionality you’ll need such as GPS and Bluetooth for a VIP driving experience every time! Just take it right now and have great fun on your way! Good luck to you!

Recent Comments