For a car owner, there is nothing better to have a comfortable and convenient car interior environment as well as embrace a brand new driving experience. To achieve that goal, you can replace your mono-functional factory radio with a new multifunctional car radio. And if you have some related installation experience, you can refer to a related car radio installation to deal with the installation process. This article is mainly about how to remove the factory radio and install a new car radio for 2004 2005 2006 2007-2008 AUDI A4. If you own the same or similar dashboard, you can take this instruction as a reference.
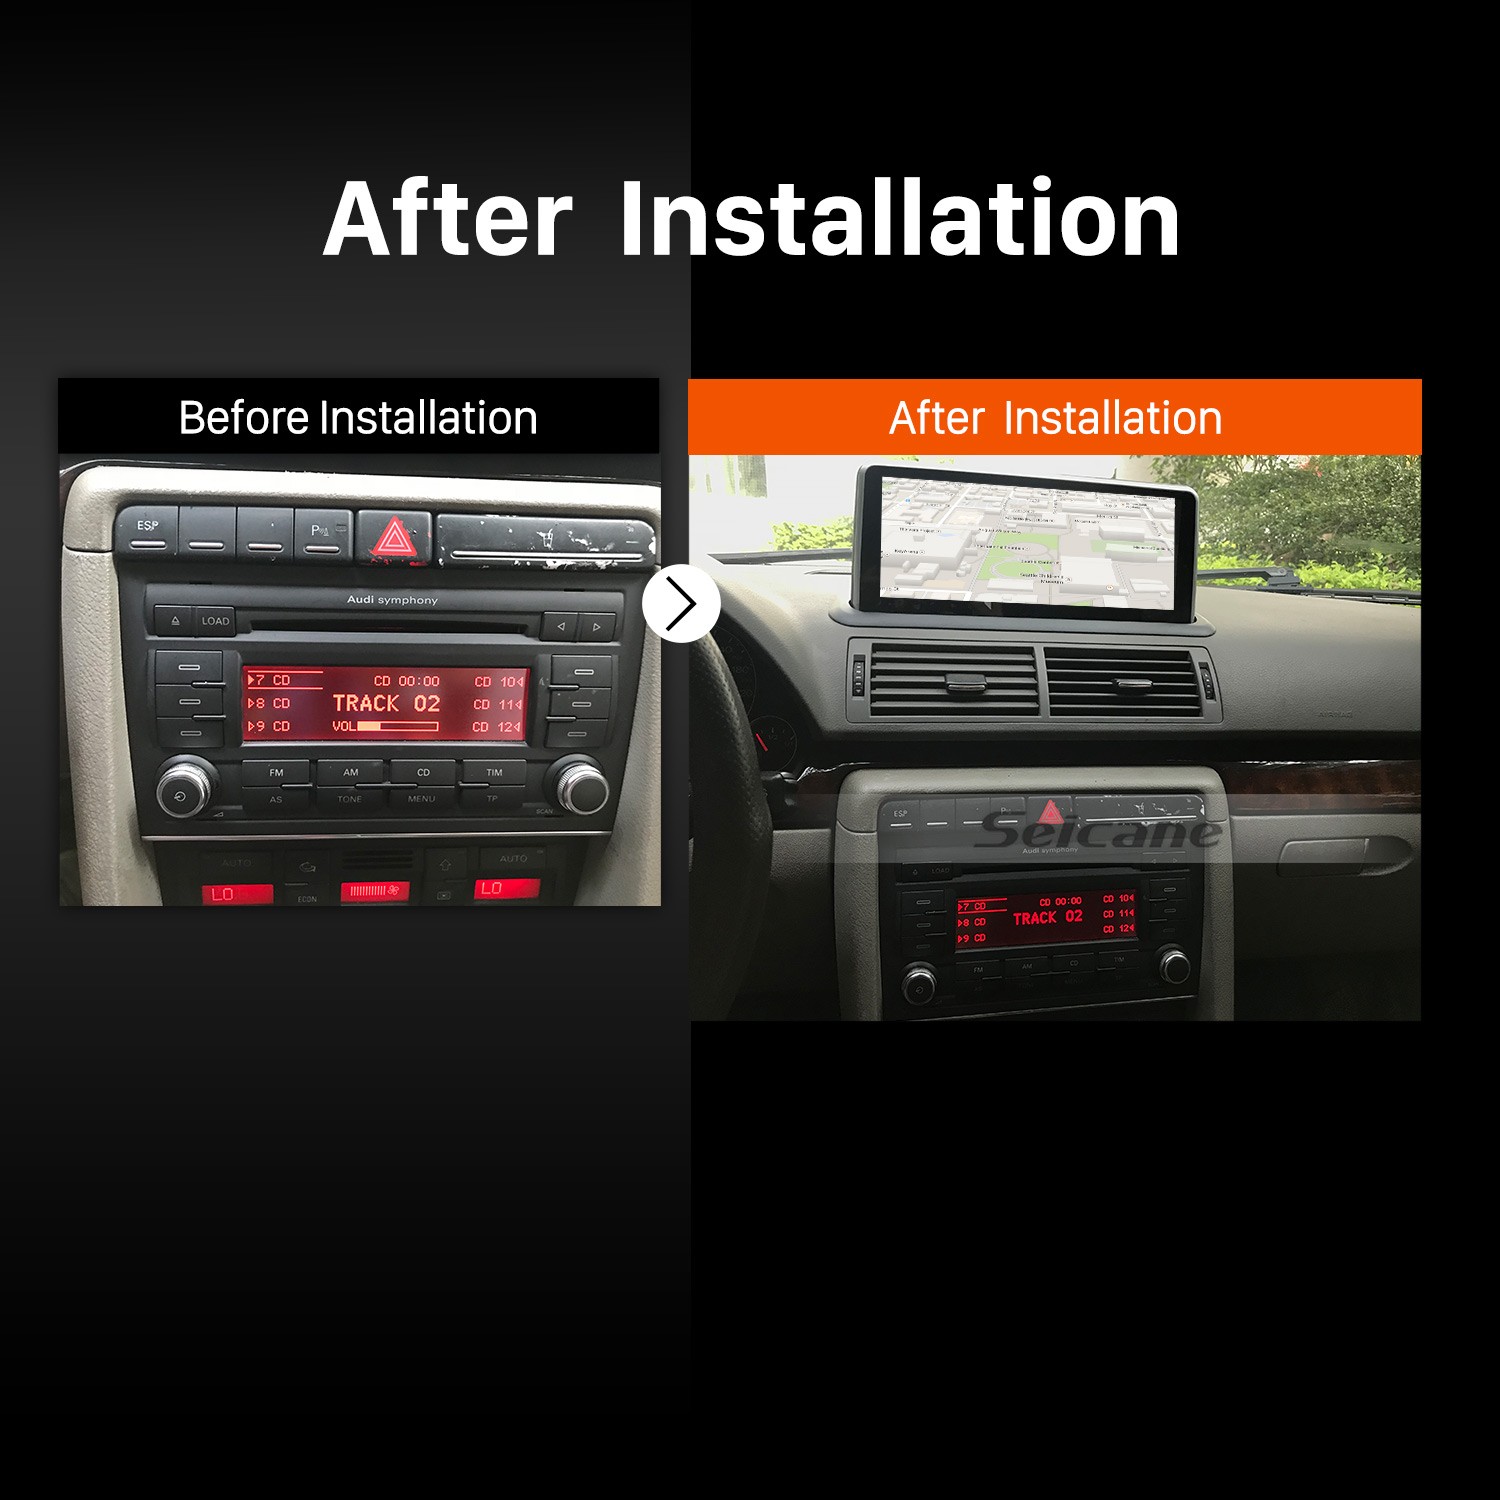
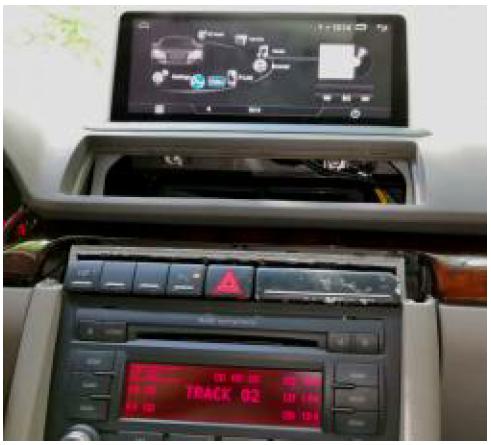
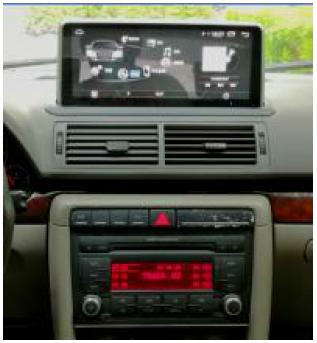
2004 2005 2006 2007-2008 AUDI A4 car radio after installation
Some tips before the installation:
1. Please disconnect the power before the installation.
2. Please prepare a lever and a screwdriver before the removal and the installation.
3. Please keep all the separate parts from the car. Please take great care of the dashboard to avoid scratching it during its detachment and installation. Please keep handy any parts from the car and make use of all the original screws from the car as much as possible. so each related part of the unit can be fixed securely.
4. For your convenience, here’s the recommended tools for removal and installation from Seicane, please check for more details: http://www.seicane.com/car-dvd-dismantling-device-srd-400
2004 2005 2006 2007-2008 AUDI A4 car radio installation instruction
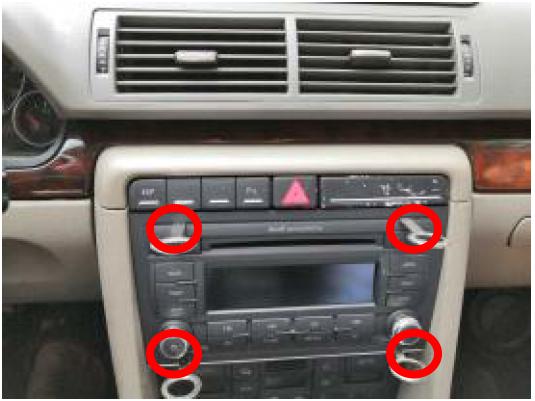
1. Original car radio dash.

Original car radio dash
2. Insert in 4 PCS Dismantled Keys.
Insert in 4 PCS Dismantled Keys
3. Take out original host.
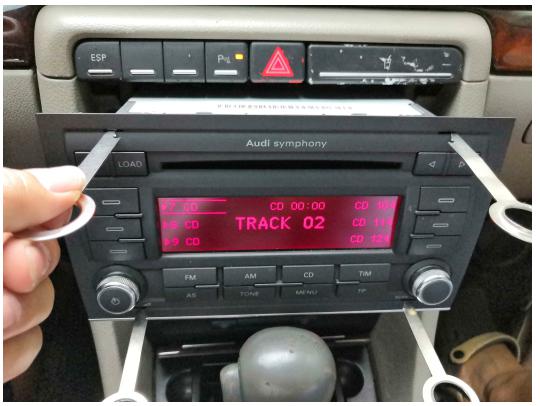
Take out original host
4. Remove the wire from original power harness.
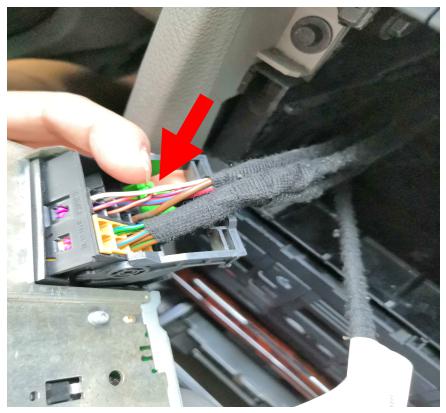
Remove the wire from original power harness
5. Take out the air outlet.
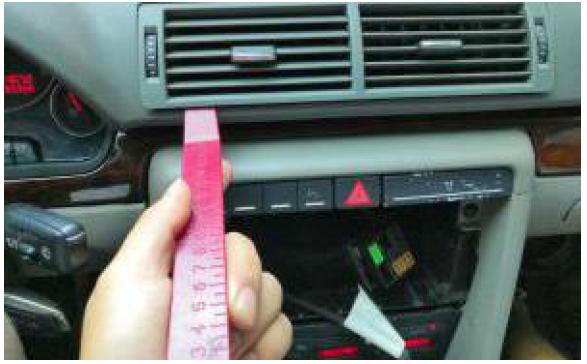
Take out the air outlet
6. Put the paper well in position.
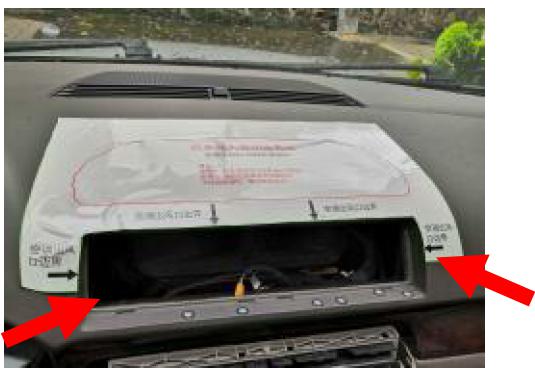
Put the paper well in position
7. Cut along Red Line.
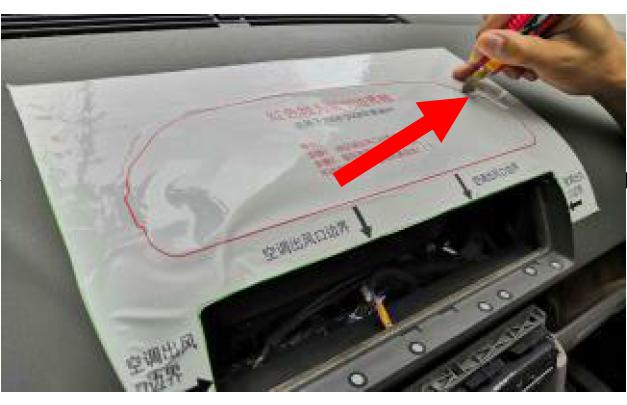
Cut along Red Line
8. Effect picture after cutting.
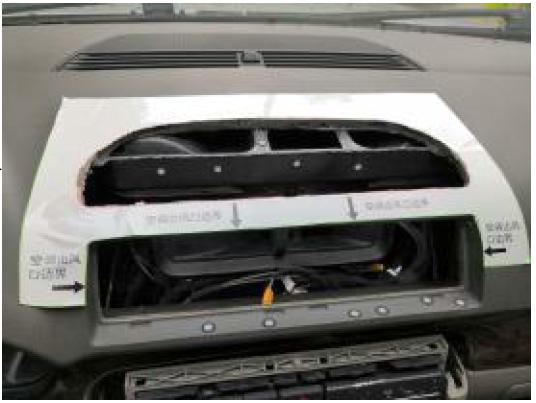
Effect picture after cutting
9. Take out Control Panel.
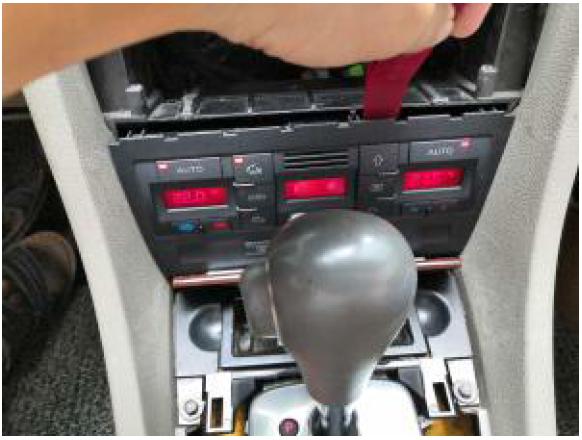
Take out Control Panel
10. Take out Gear Decorated cover.
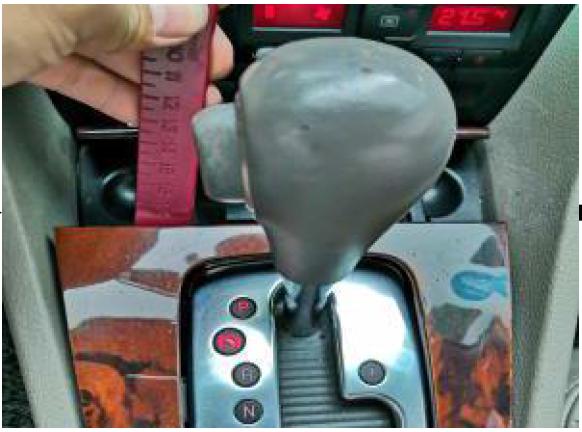
Take out Gear Decorated cover
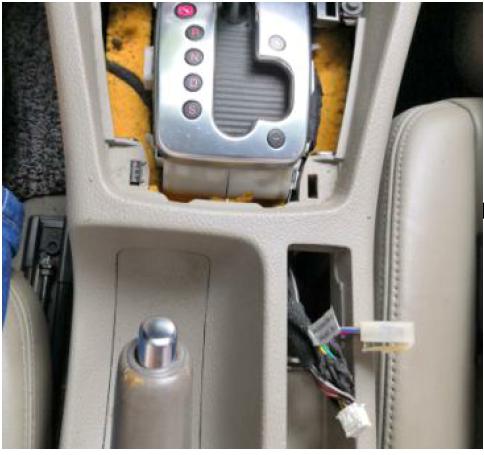
11. Take out Cigar Lighter.

Take out Cigar Lighter
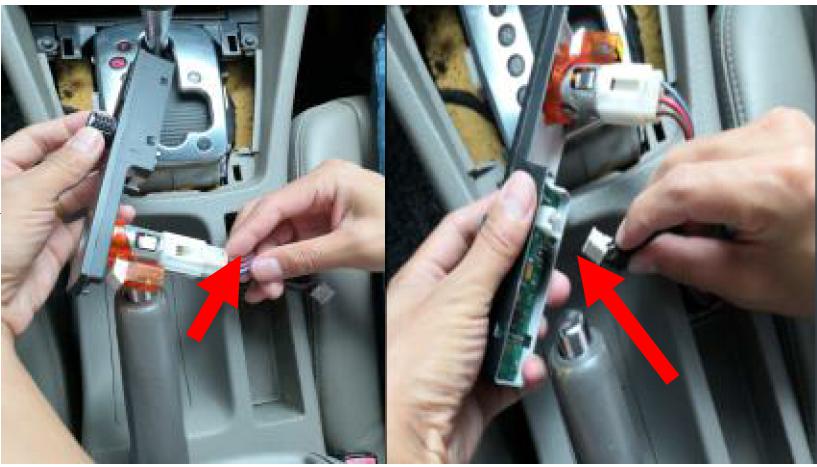
12. Dismantle the cigar light(Metal and Plastic).
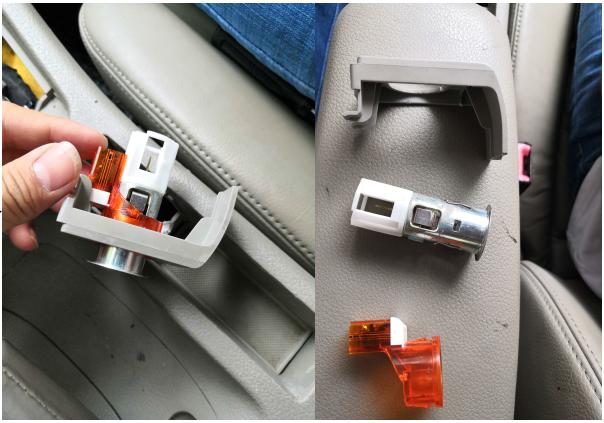
Dismantle the cigar light(Metal and Plastic)
13. Install well the cigar lighter into Android IDRIVE.
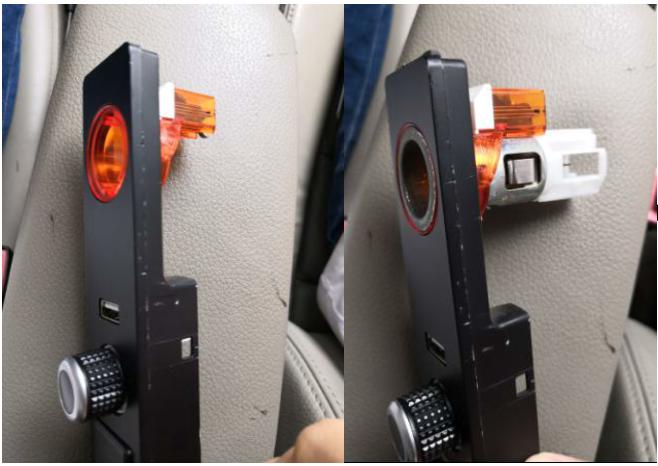
Install well the cigar lighter into Android IDRIVE
14. Let IDRIVE cable go through original lighter hole.
Let IDRIVE cable go through original lighter hole
15. Plug on lighter cable and put the IDRIVE cable into IDRIVE box.
Plug on lighter cable and put the IDRIVE cable into IDRIVE box
16. Remove gasket,locked the IDRIVE button well with PW3.5X8 screw.
Remove gasket,locked the IDRIVE button well with PW3.5X8 screw
17. Put well IDRIVE Button.
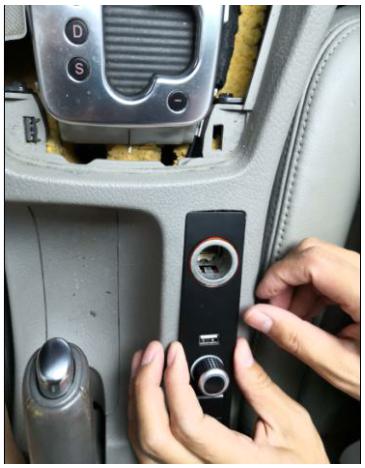
Put well IDRIVE Button
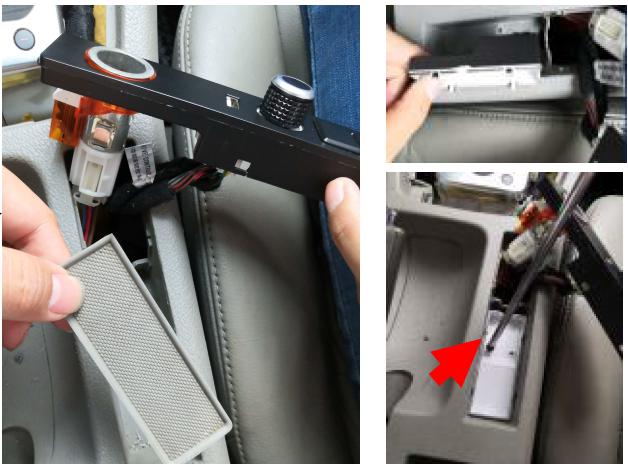
18. Pry loose, take out the decoration strip and screws.
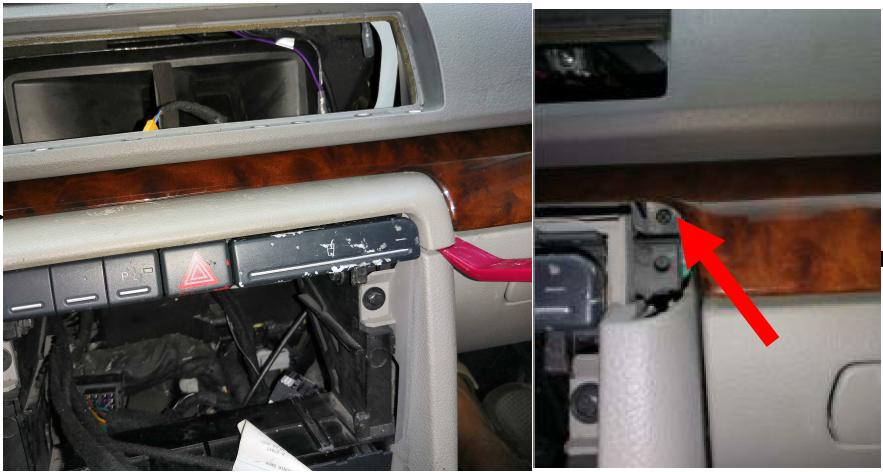
Pry loose, take out the decoration strip and screws
19. Plug well all Android cables and original power harness plug into android Adaptor.
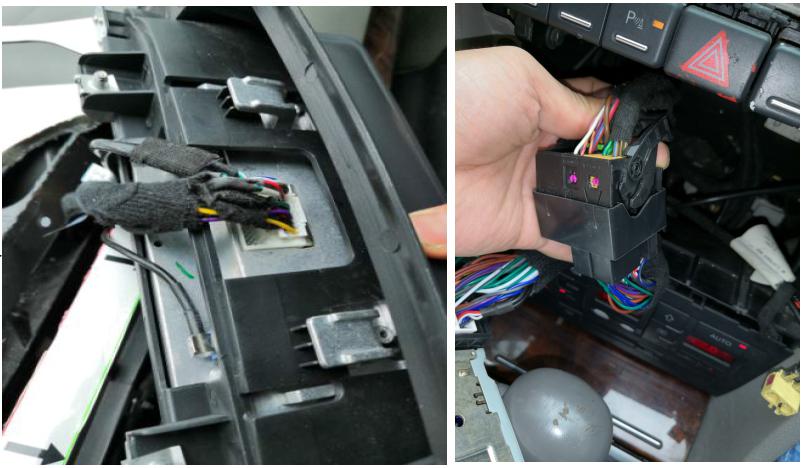
Plug well all Android cables and original power harness plug into android Adaptor
20. Locked back original Screws,then the holder can be fixed well.
Locked back original Screws,then the holder can be fixed well
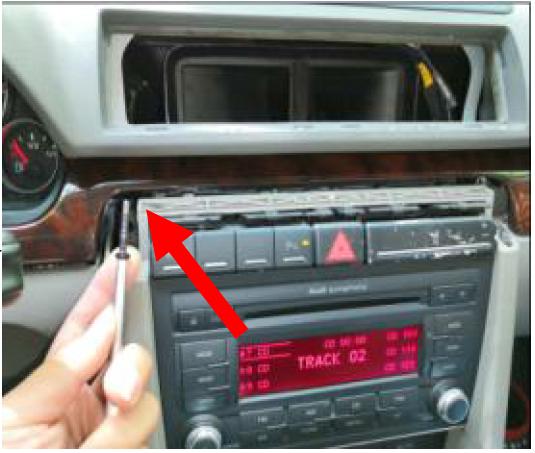
21. Check all the wiring and power on to test.
Check all the wiring and power on to test
22. Press button “CD”twice ,switching to “TRACK02”,then Android will have sound.
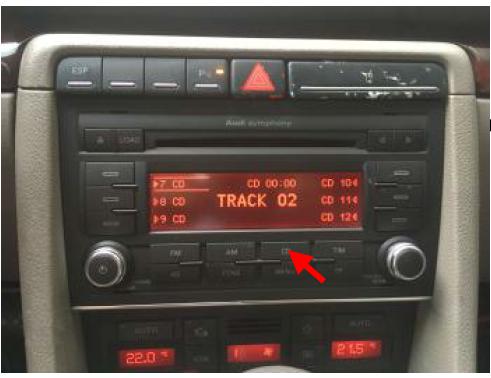
Press button “CD”twice ,switching to “TRACK02”,then Android will have sound
23. Full test the functions and IDRIVE BUTTON.
Full test the functions and IDRIVE BUTTON
24. Installation is done.
Installation is done
That’s all about how to remove a factory radio and install a new car radio for 2004 2005 2006 2007-2008 AUDI A4. If you have any doubts, there are three kinds of people who you can seek help from, including your dealer, someone experienced or a professional. If you still think it hard for you to deal with the installation independently, you can straightly go to a car radio upgrade center and get the new car radio installed by a professional technician. Anyway, before installation, it is essential for you to pick an ideal car radio. If you have no ideas, here I would like to share an amazing 2004 2005 2006 2007-2008 AUDI A4 car radio from Seicane with you. For more details, please click:
With this car radio installed in your car, you will be able to enjoy its enhanced capabilities, improved configurations and higher performance.
Equipped with a smart HD multi-touch screen, this car radio makes it possible for you to enjoy the perfect display of videos, TV programs, movies, etc, therefore you will gain a lot of fun.
Under the guidance of the turn-by-turn directions and voice prompts provides by the worldwide real-time GPS navigation system, you are able to easily locate where you are and accurately find the right way to get to any locations you would like to go to. Besides, thanks to this unit’s dual zone function, you can freely listen to your favorite music while navigating. And the music will automatically switch to GPS voice.
What’s more, through the Bluetooth connection between your Bluetooth-enabled mobile phone and this unit, both Bluetooth hands-free phone calls and Bluetooth streaming music are available for you. With this Bluetooth technology, you can gain both great convenience and enjoyment.
If you like this unit, just don’t hesitate to add this car radio to your shopping cart right now. Good luck!


Recent Comments