Under the strike of Russian and Ukraine and the pandemic affect, many industrial service has suffered the difficult time for living. On the other hand, the DIY concept has higher acceptance in public, no exception for car stereo installation. Suppose you are the owner of BMW Series 3, it’s a wise choice for you to replace the BMW Series 3 by yourself in order to lower the chance of contracting and reduce the budget. Nevertheless, not many people know how to accomplish this complex task on their own. To clean off these confuses, the following essay of BMW Series 3 2013-2016 Stereo will set a good example for those who are in need.
Before installation, you should pay attention to some important tips. First of all, you can disconnect the power and prepare some tools such as lever before the removal and the installation. Secondly, you should keep all the separate parts from the car and take great care of the dashboard to avoid scratching it during its detachment and installation.
Last but not least, you should keep handy any parts from the car and make use of all the original screws from the car as much as possible so that each related part of the unit can be fixed securely.
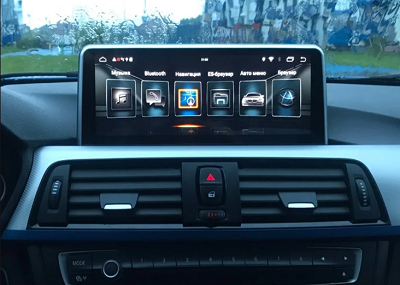
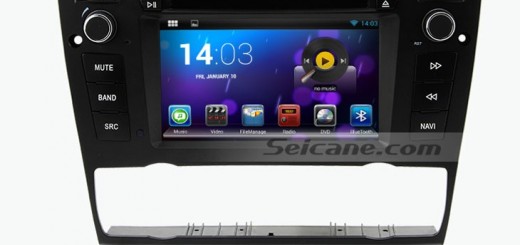
Installation Instruction of Navigation for BMW Series 3 2013-2016
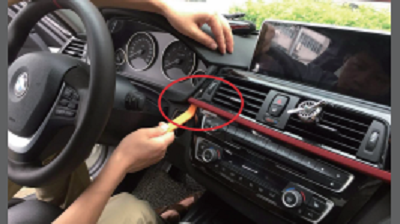
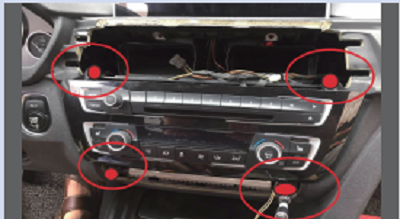
1.Lever decoration panel from the right side to the left.
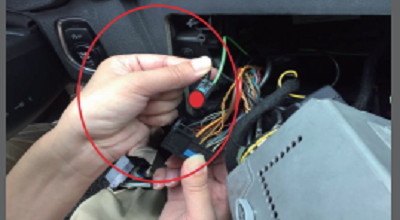
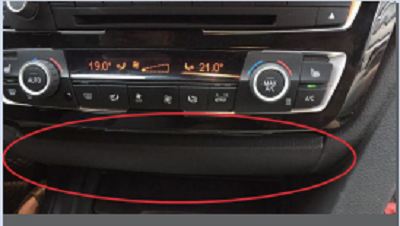
2.Disconnect the 2 wires as shown and Lever the bottom decoration cover.
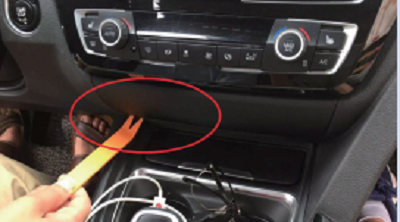
3.Pull the cover out and disconnect the wire.
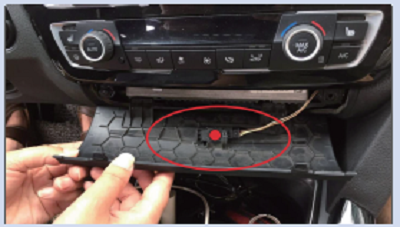
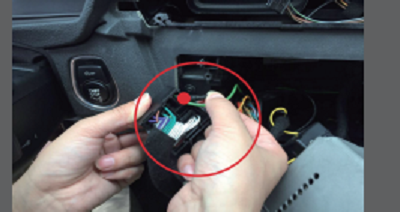
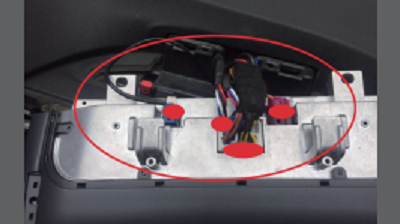
4.Take off 4 marked screws, pull out the button assembly and put it aside.
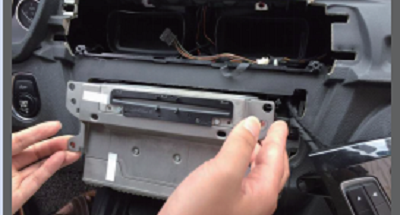
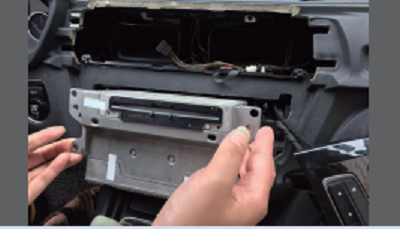
5.Take off 4 marked screws on head unit and pull out the head unit.
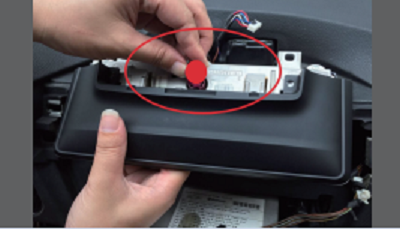
6.Take off 2 screws as reveal and pull out the screen, unplug the wiring.
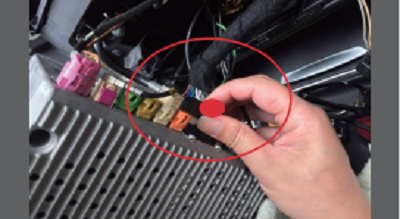
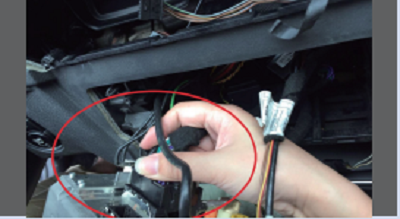
7.Pick up buckle of the cable and pull the main cable out.
8.Lever the OEM buckle of fiber optical (if with OEM fiber optical) and Unplug the fiber optical connector from OEM cable.
9.Connect the unplugged fiber optical connector with new wiring(if with OEM fiber optical) and check the connection.
10.Connect OEM male connector with new female connector and the new wiring with the back of original radio.
11.Adjust the place of all wiring and put the head unit back.
12.Connect new cable and OEM LVDS connector with new screen.
13.Fix the new screen and 2 screws at the bottom as well as the screws of head unit.
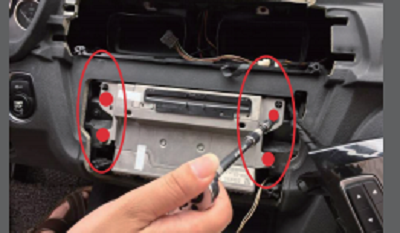
14.Fix 4 screws as revealed and put the AC vent assembly back.

15.Install the bottom decoration cover.
In deed, it is not easy to complete the process of installing 2013-2016 BMW 3 Series Radio by yourself. But it doesn’t take you much time and energy to finish it as long as you want. If you meet any difficulties during this procedure, you can ask for the experienced car dealer for help or just search the answers via internet such as the Seicane which focuses on providing professional services and product knowledge tutorials to customers all the time. If you want to know more information and details, you can contact them via phone or e-mail. I am sure they will position yourself to benefit.


Recent Comments